Main views
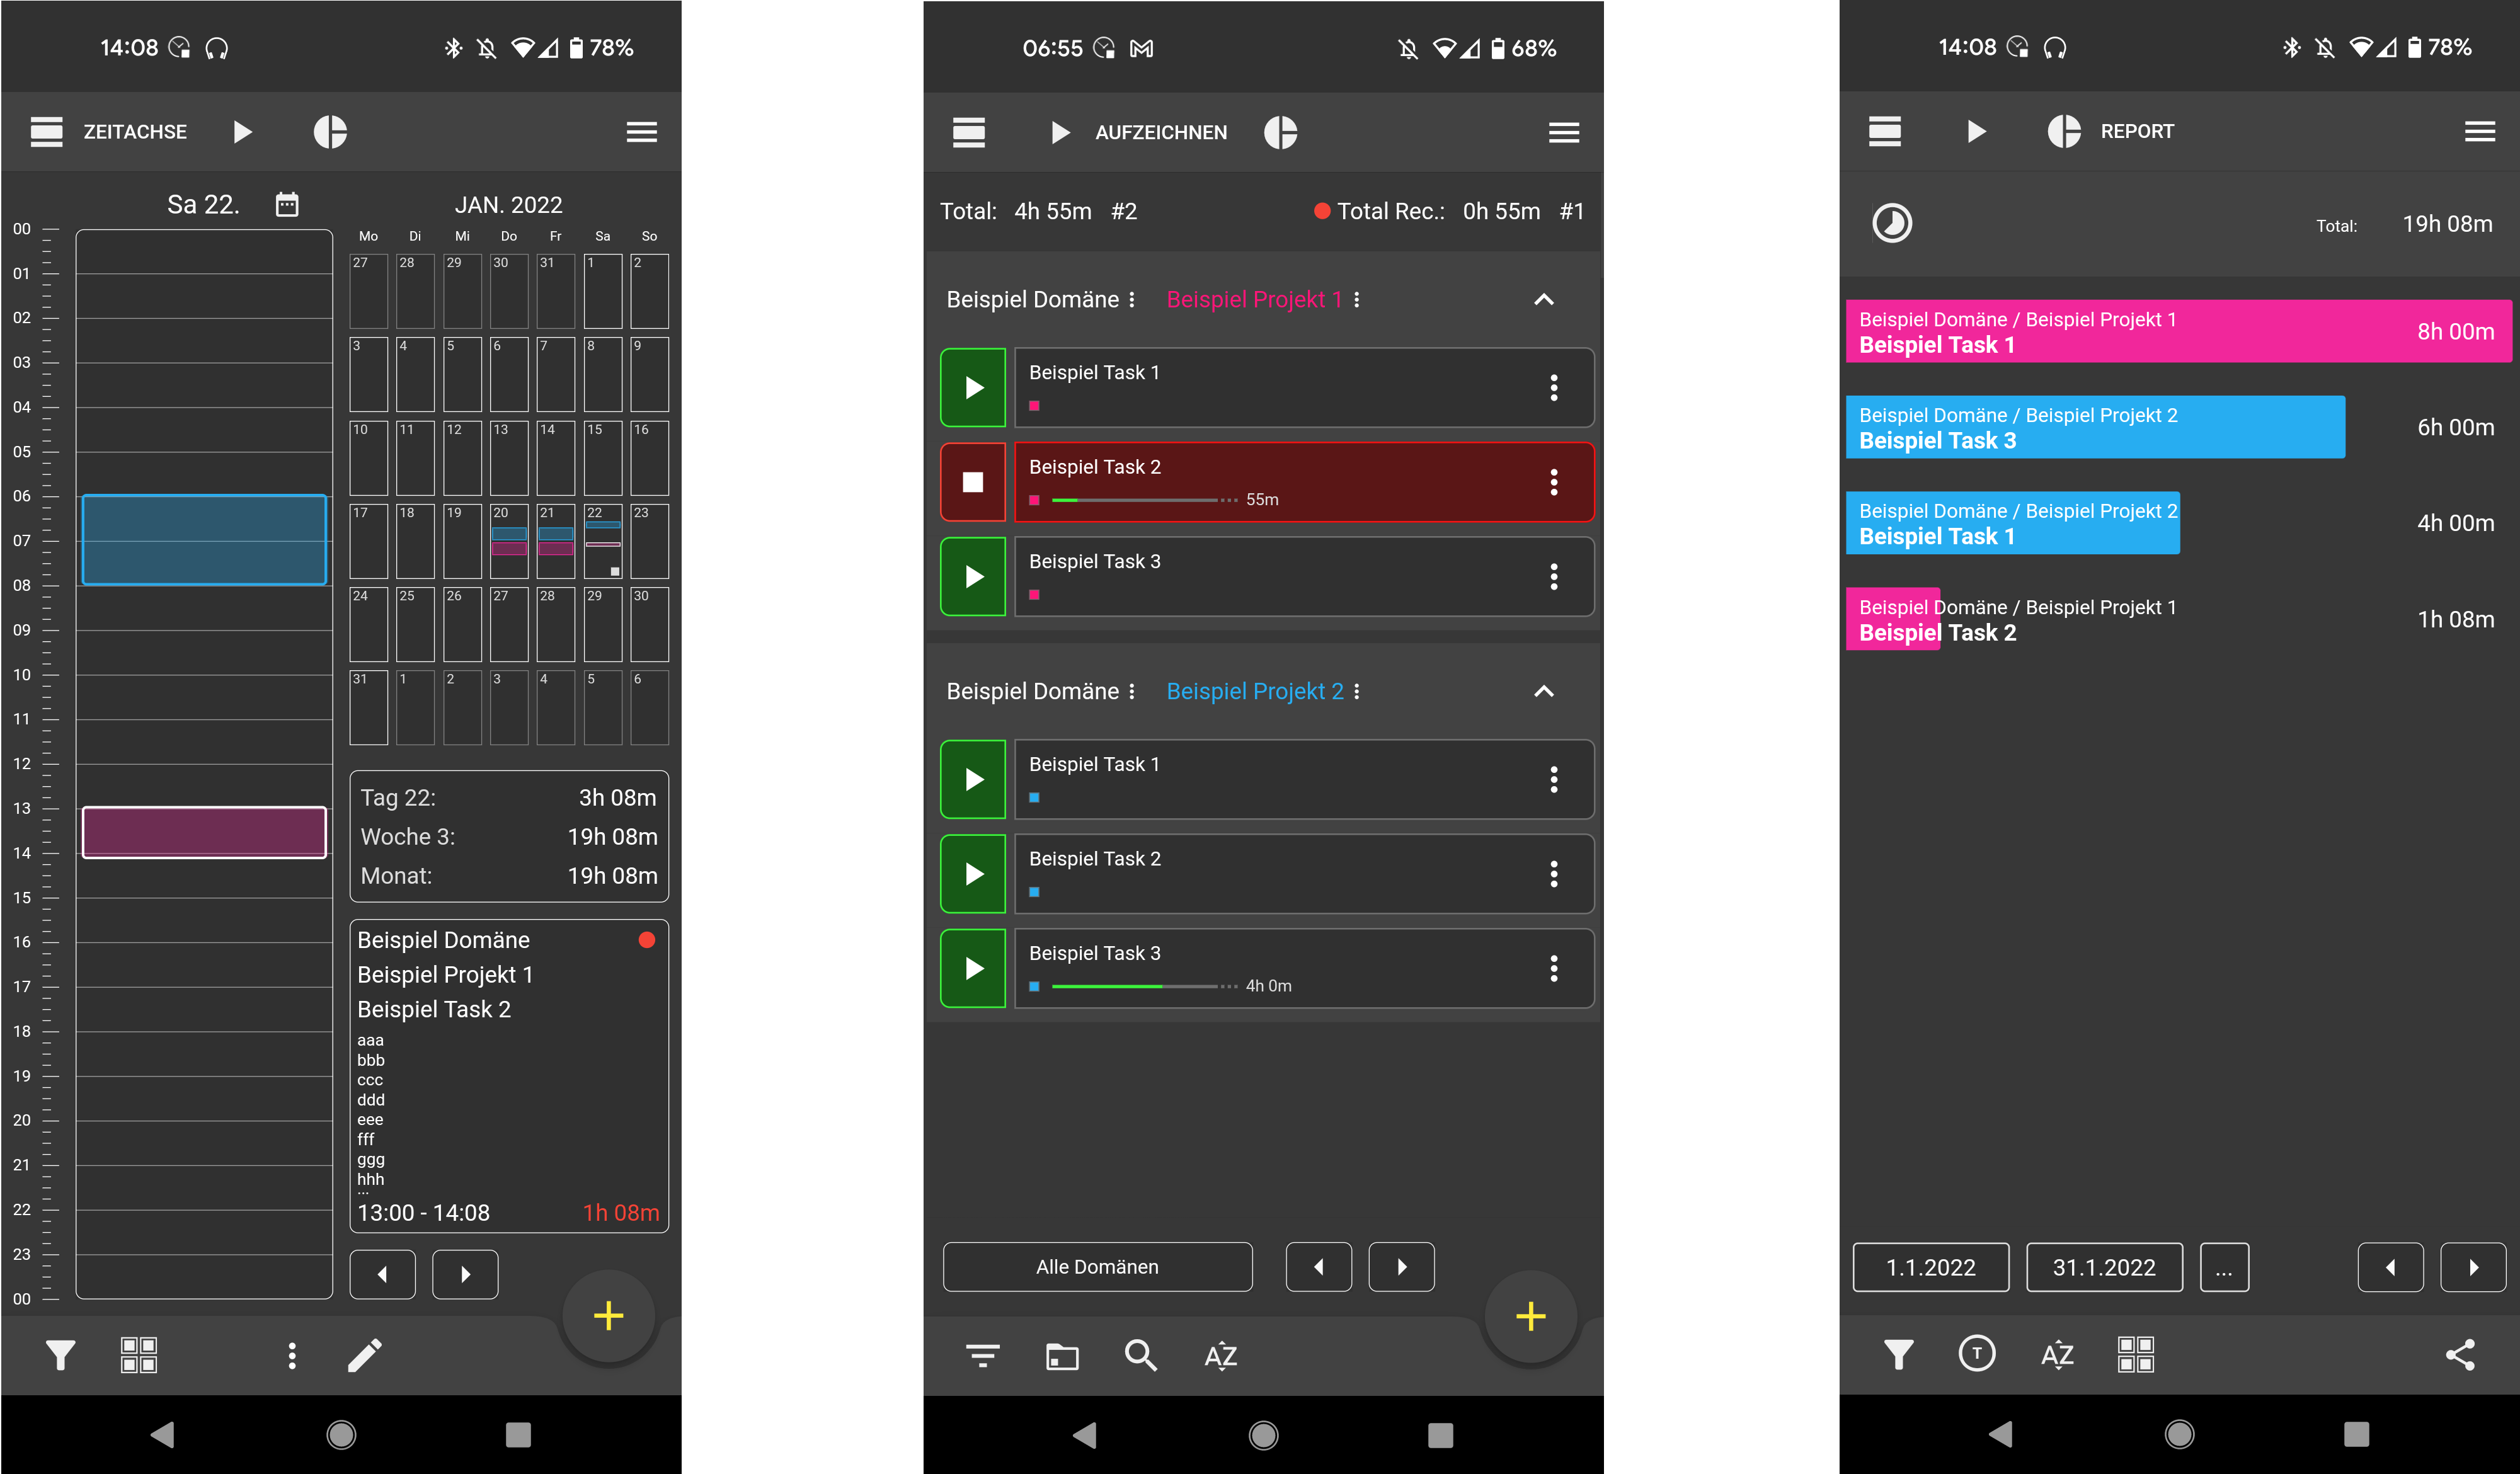
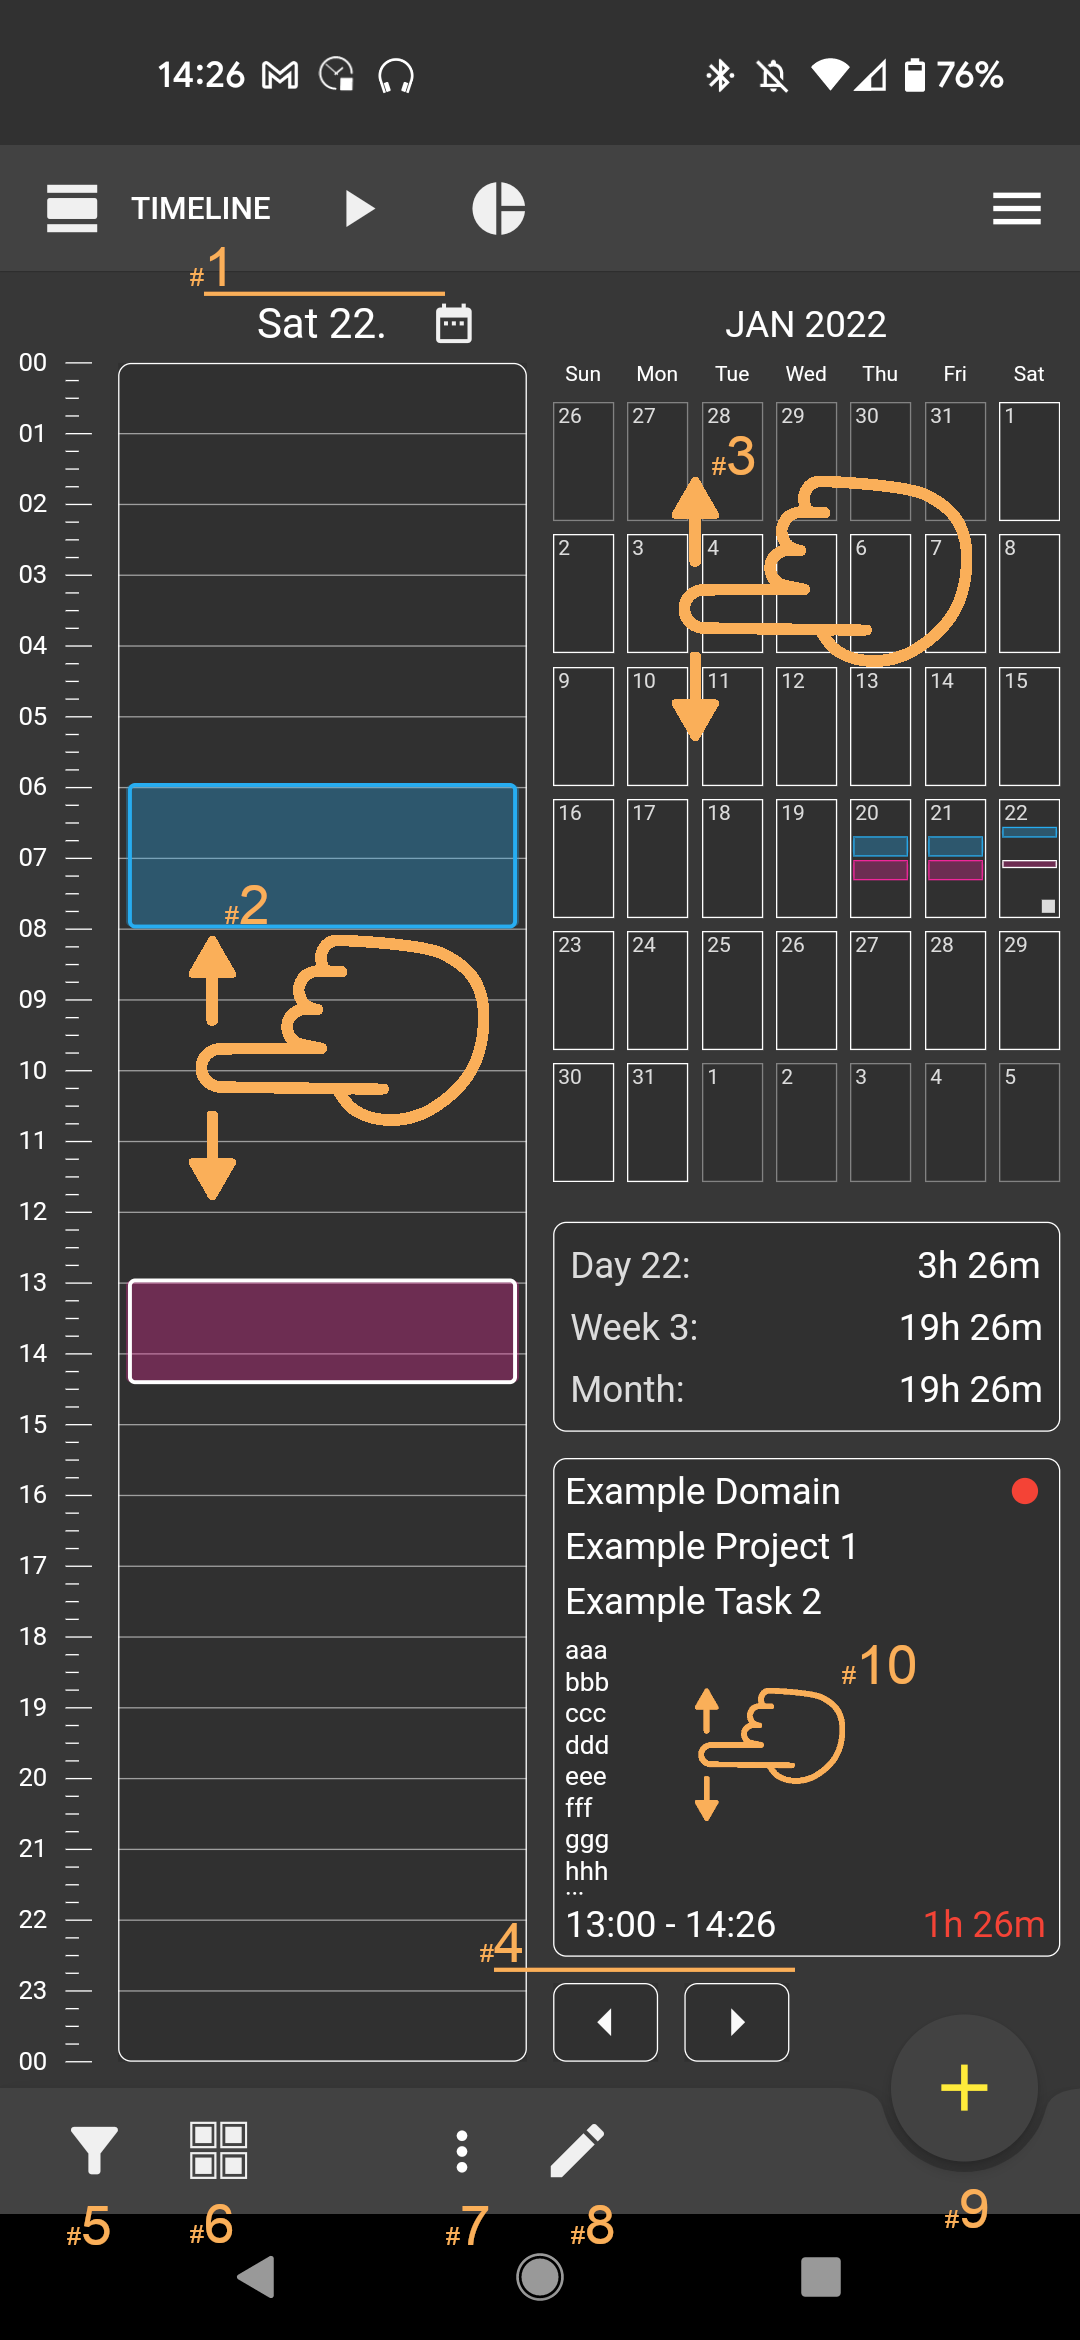
Swipe left and right to switch between timeline, recording view and report view.
Timeline
Record view
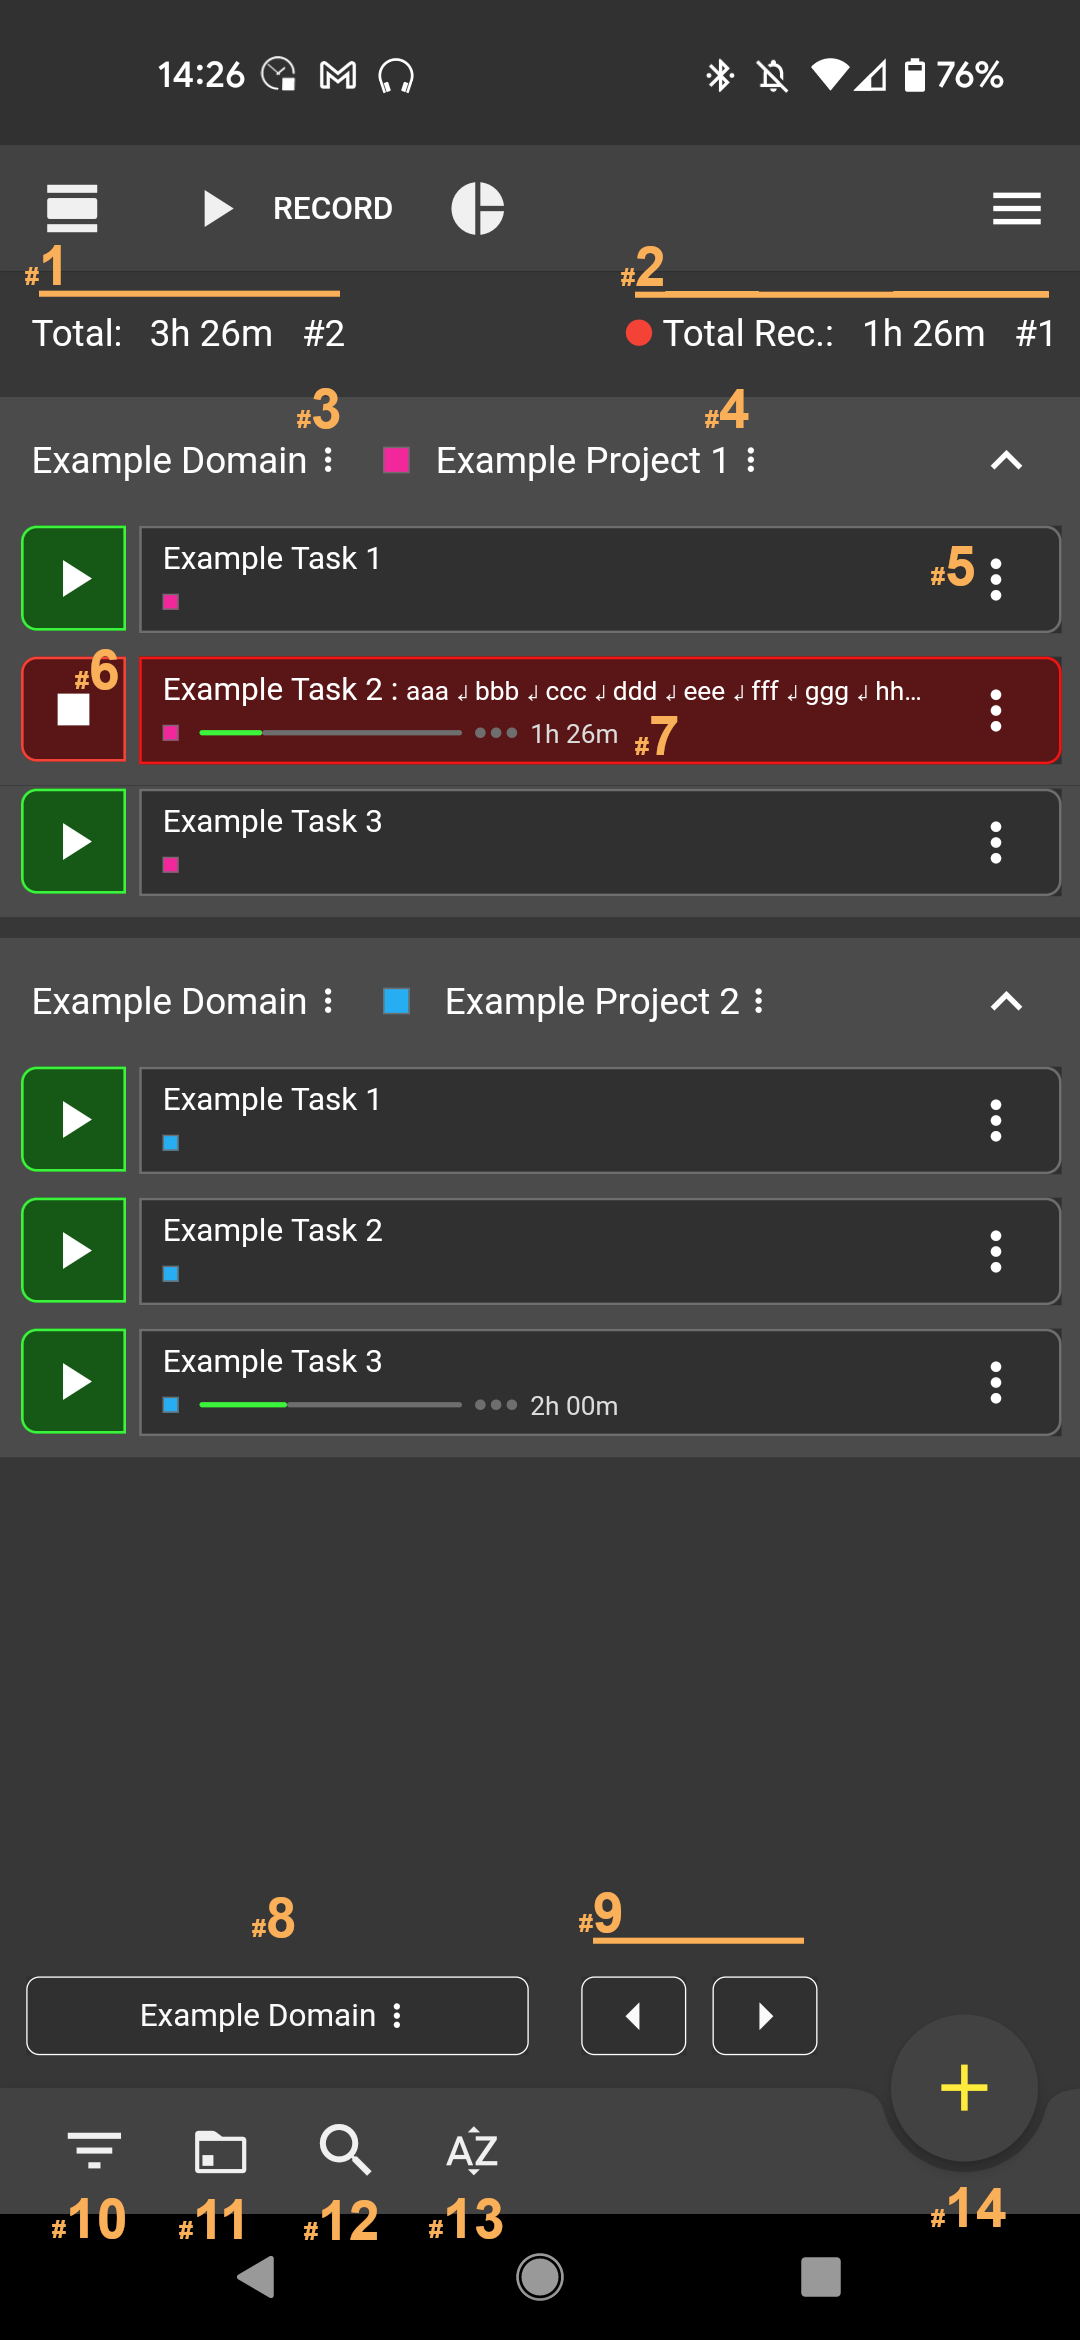
The green progress bar shows the current time for this task on this day. The front part runs from 0 to 6 hours. Once 6 hours have been reached, a dot behind it also turns green and the progress starts again at 0. When 24 hours have been reached, the progress bar and the 3 points are completely green.
Report view
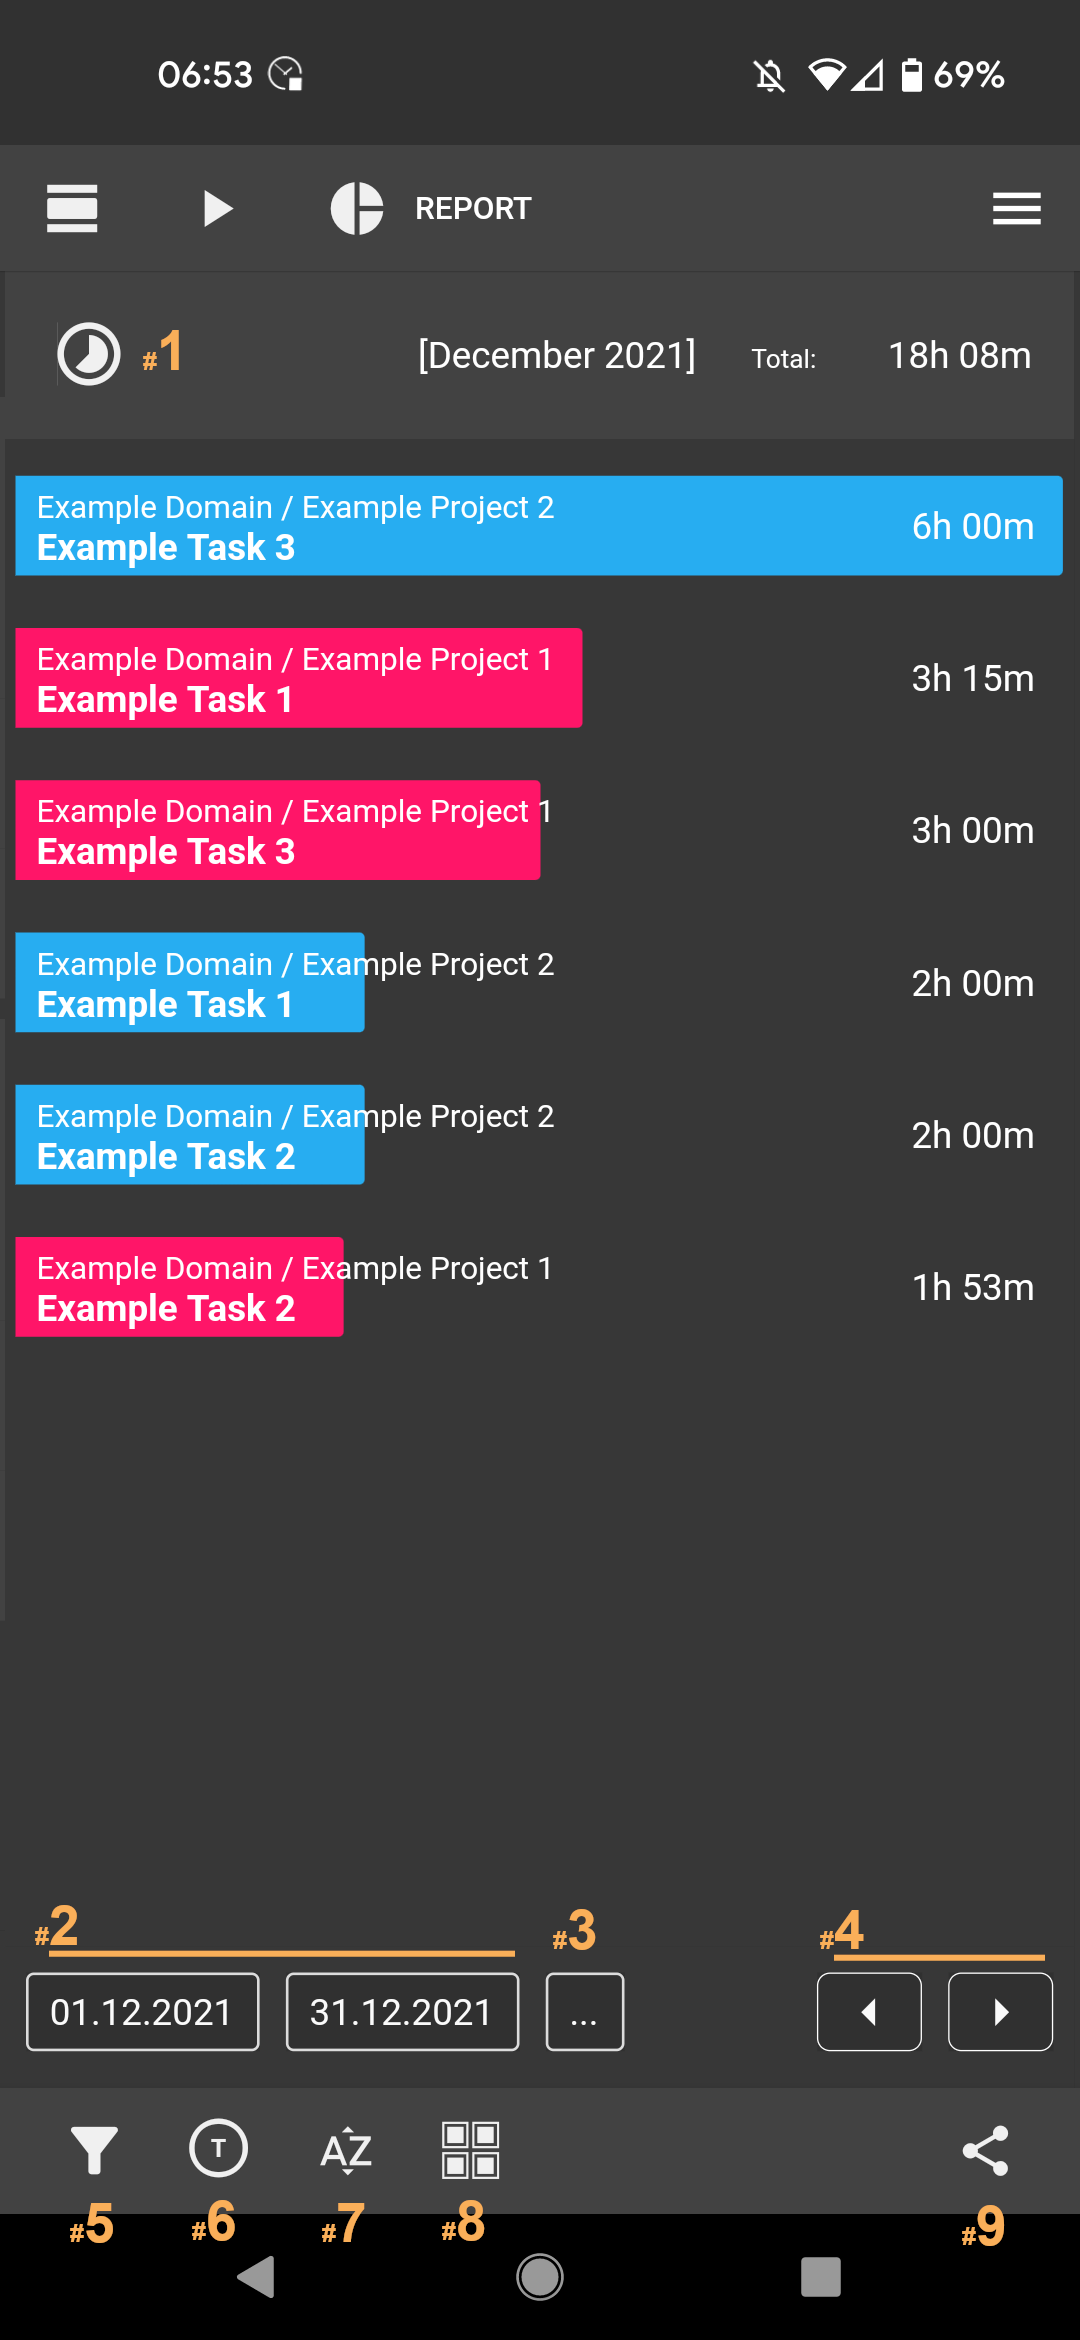
Coming soon...
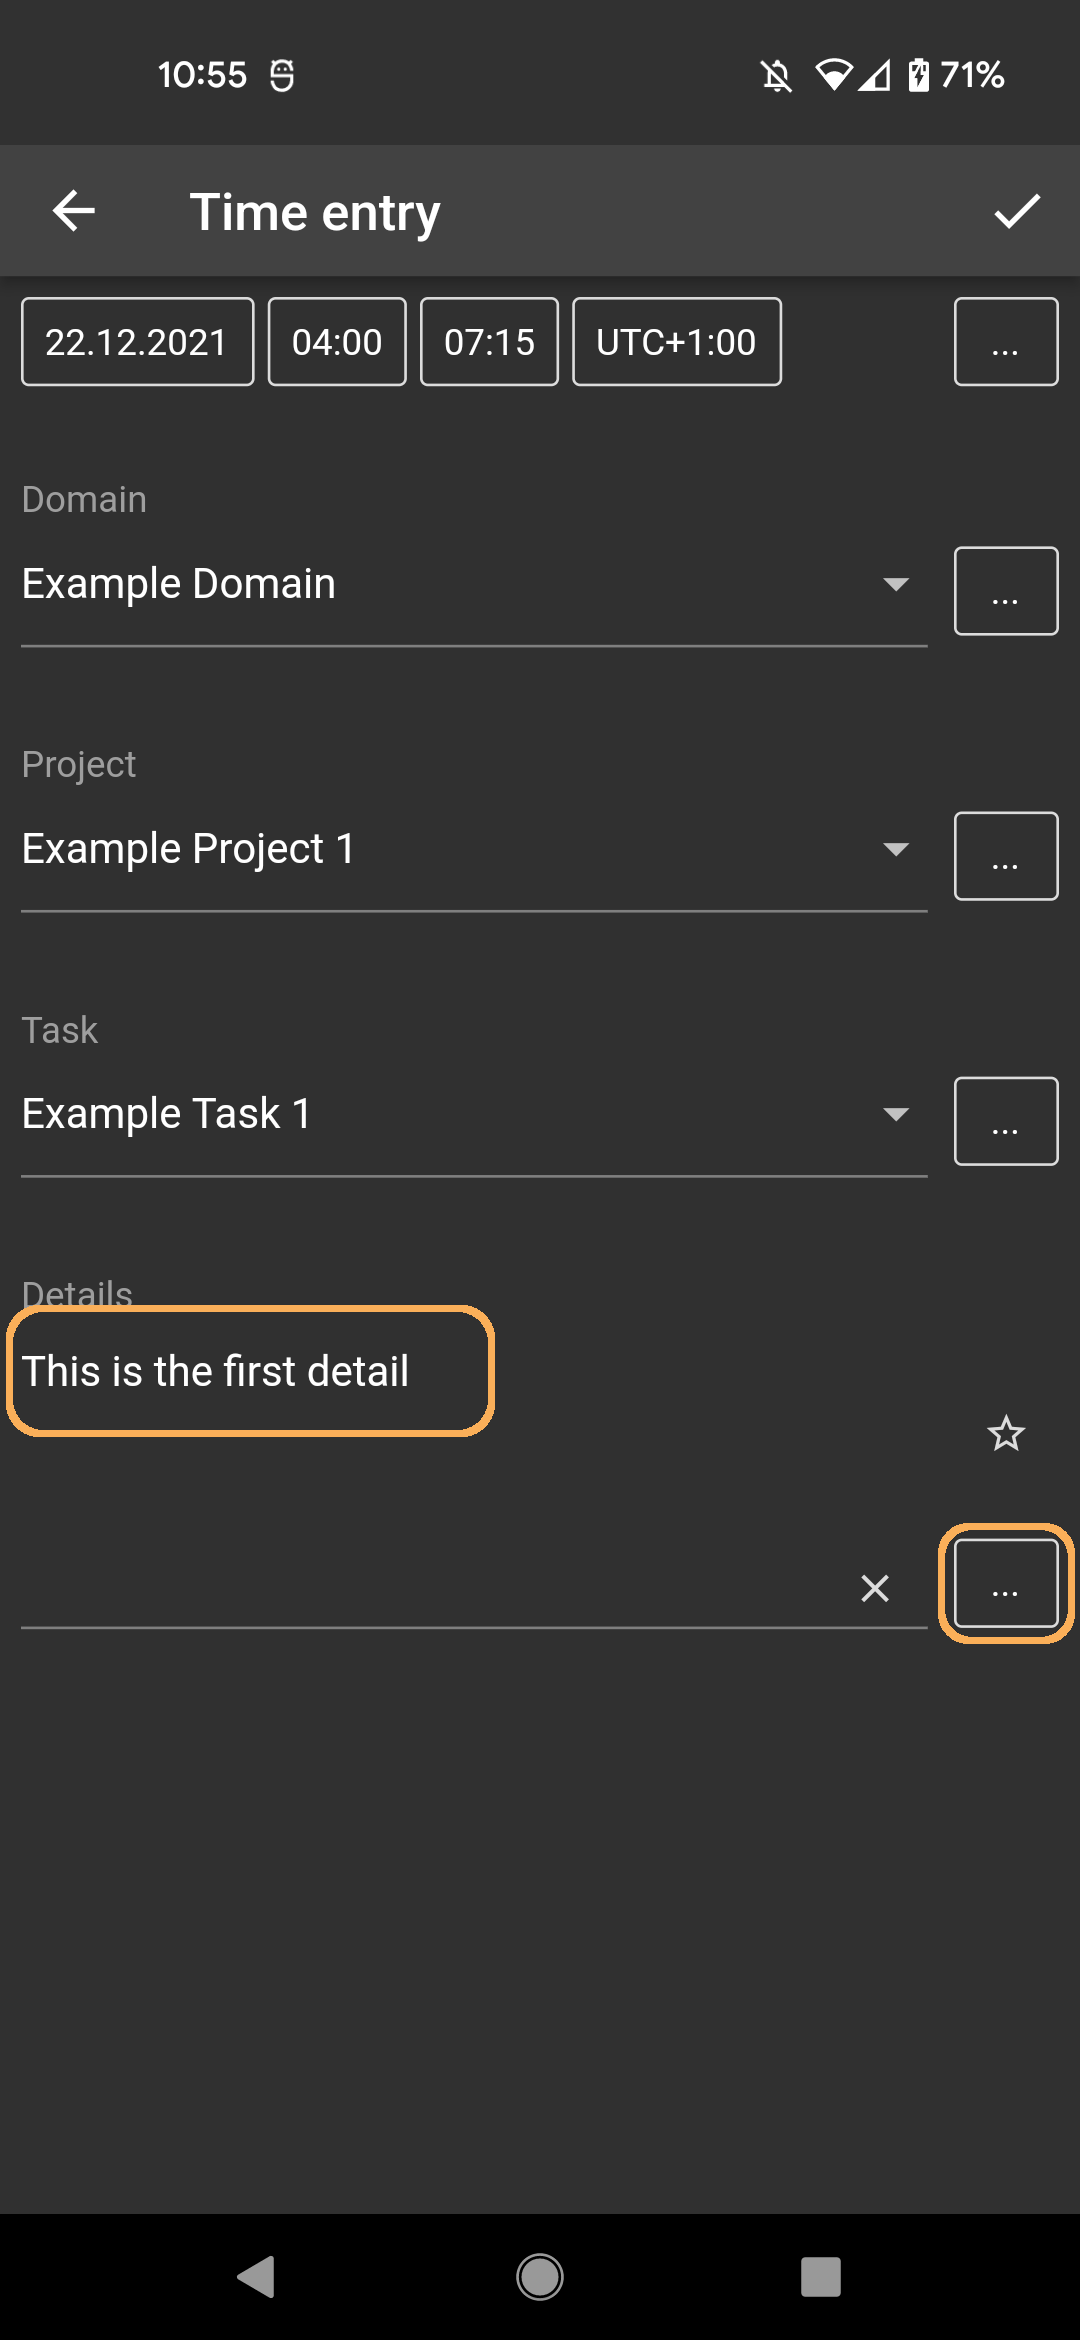
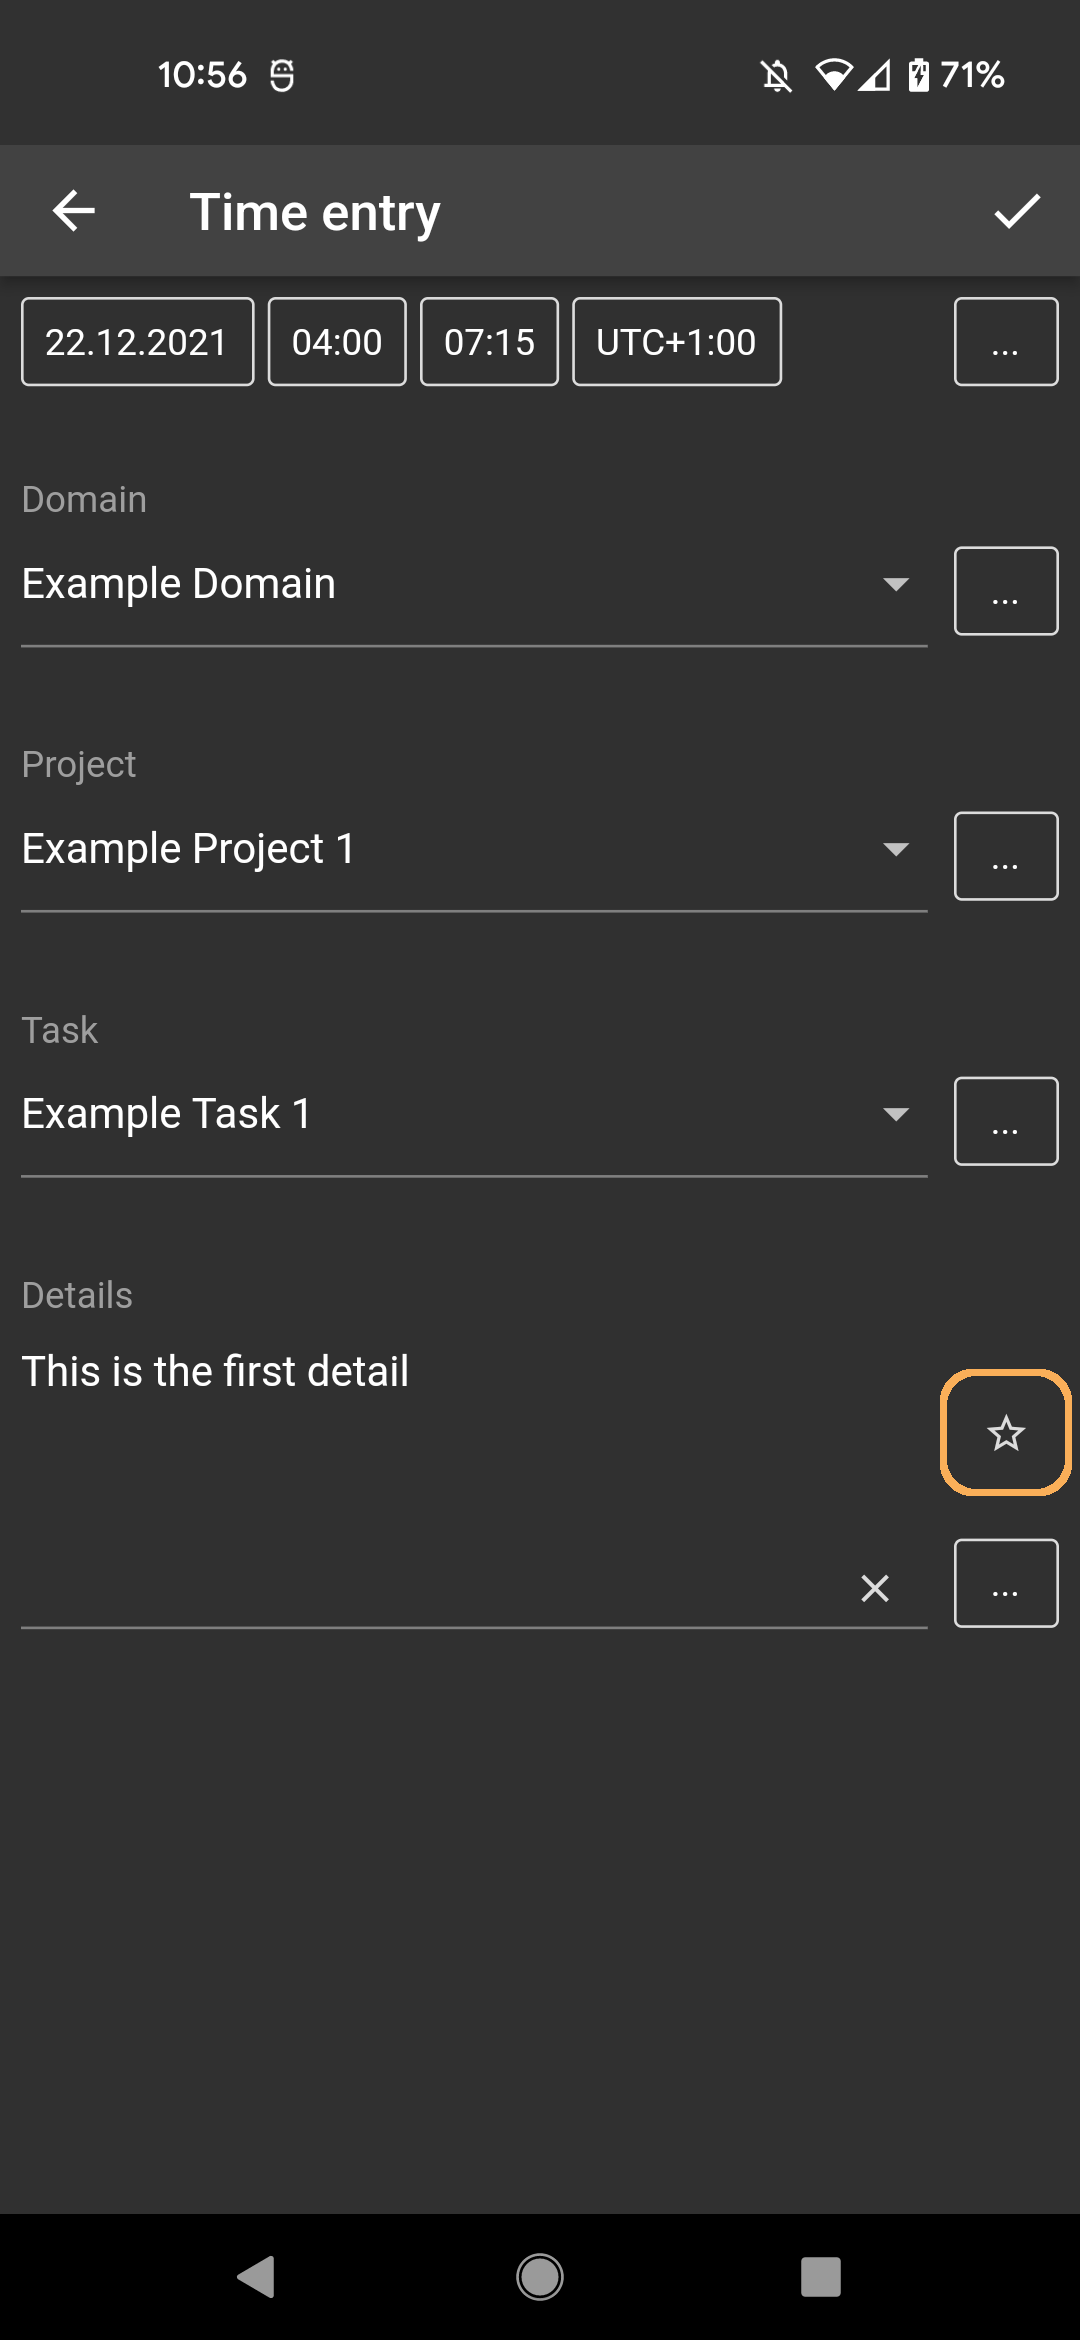
Each time entry can have a free-text. Often you will use such a text in several time entries. Gleeo Time Tracker supports you by this. How exactly and how you enter or change a time entry detail, you can learn in this short tutorial.
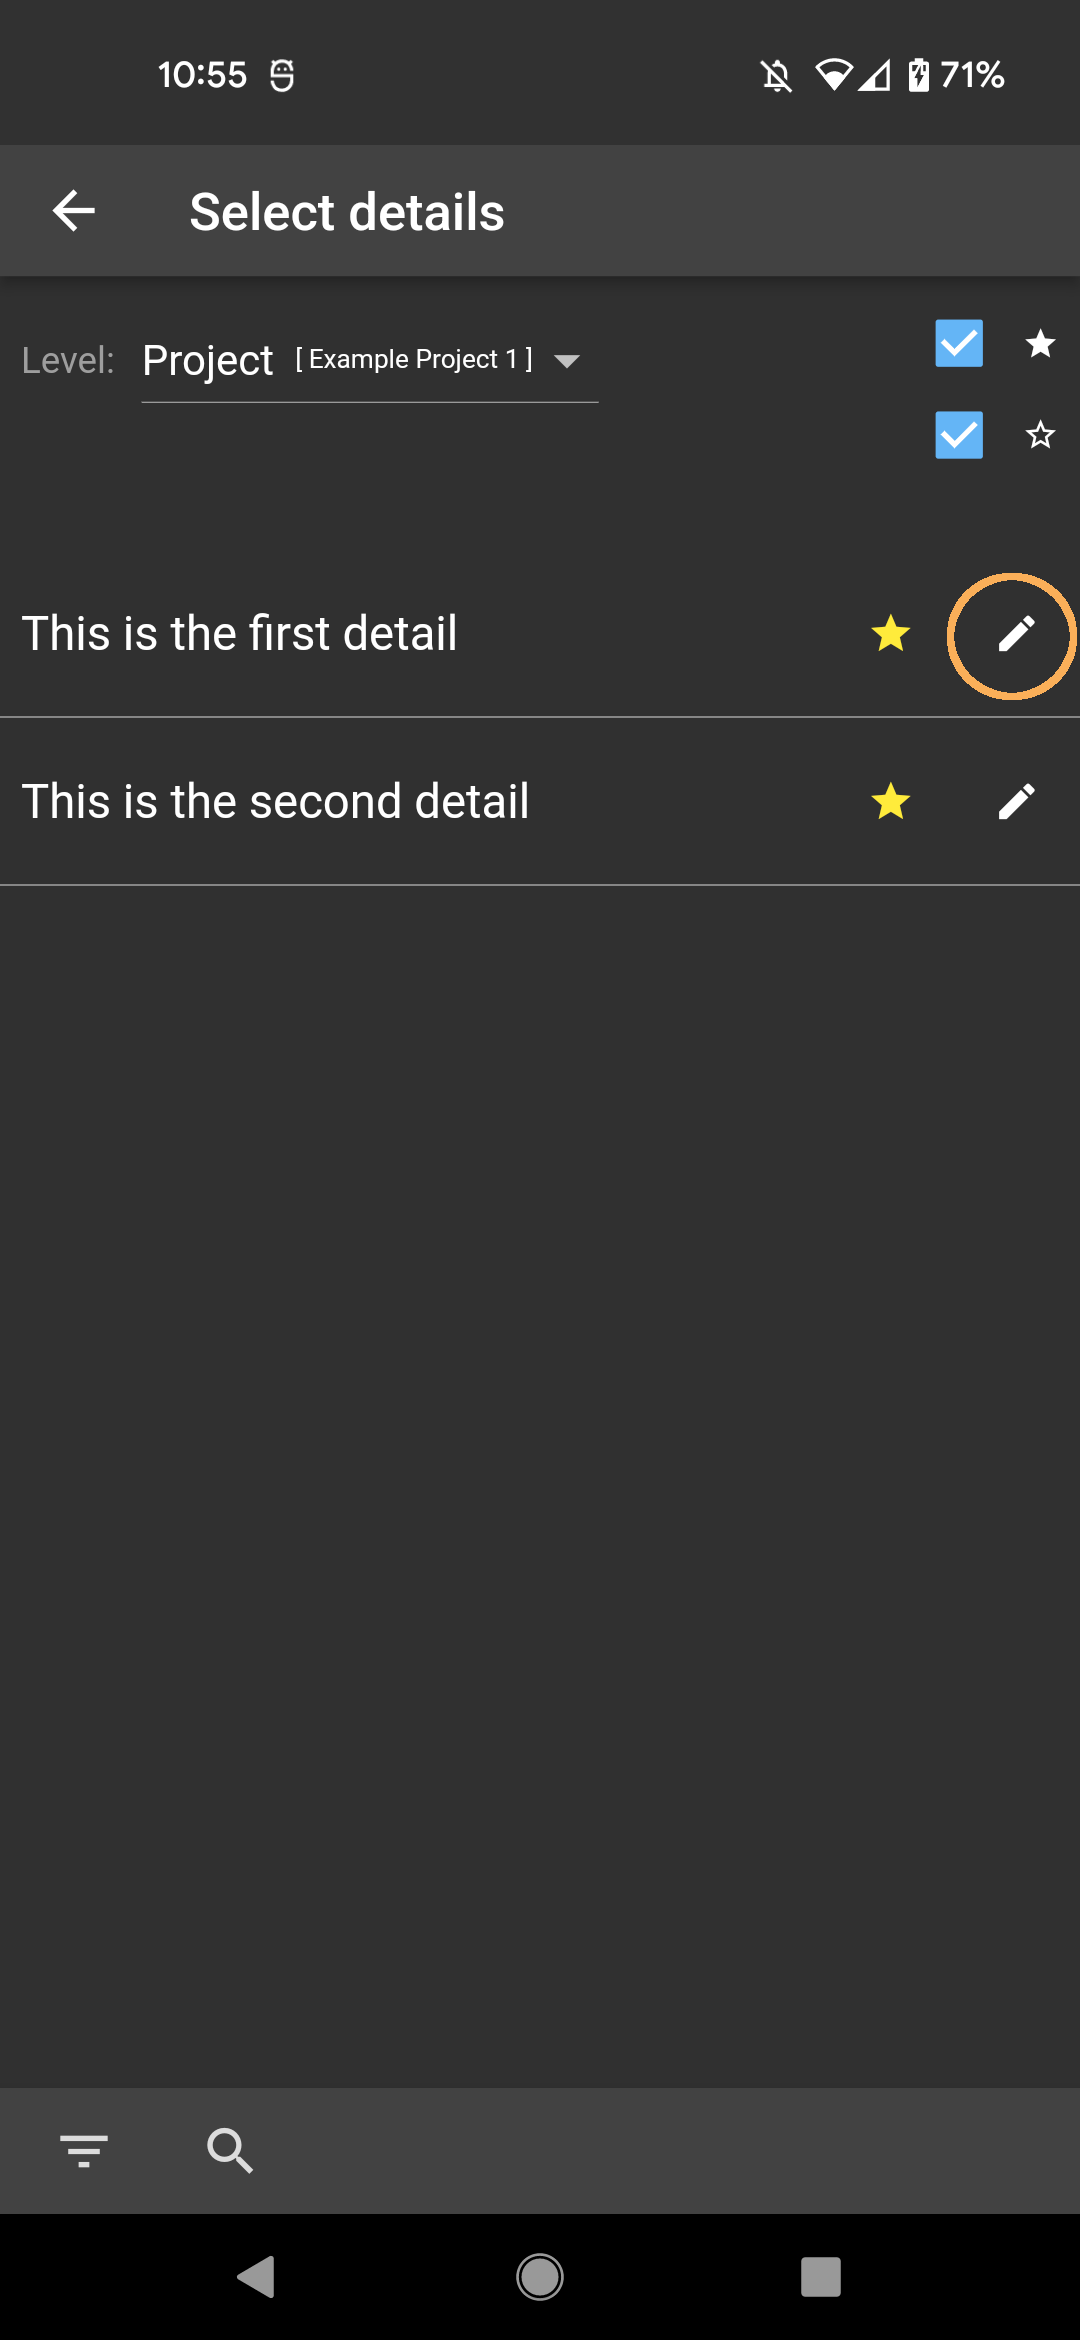
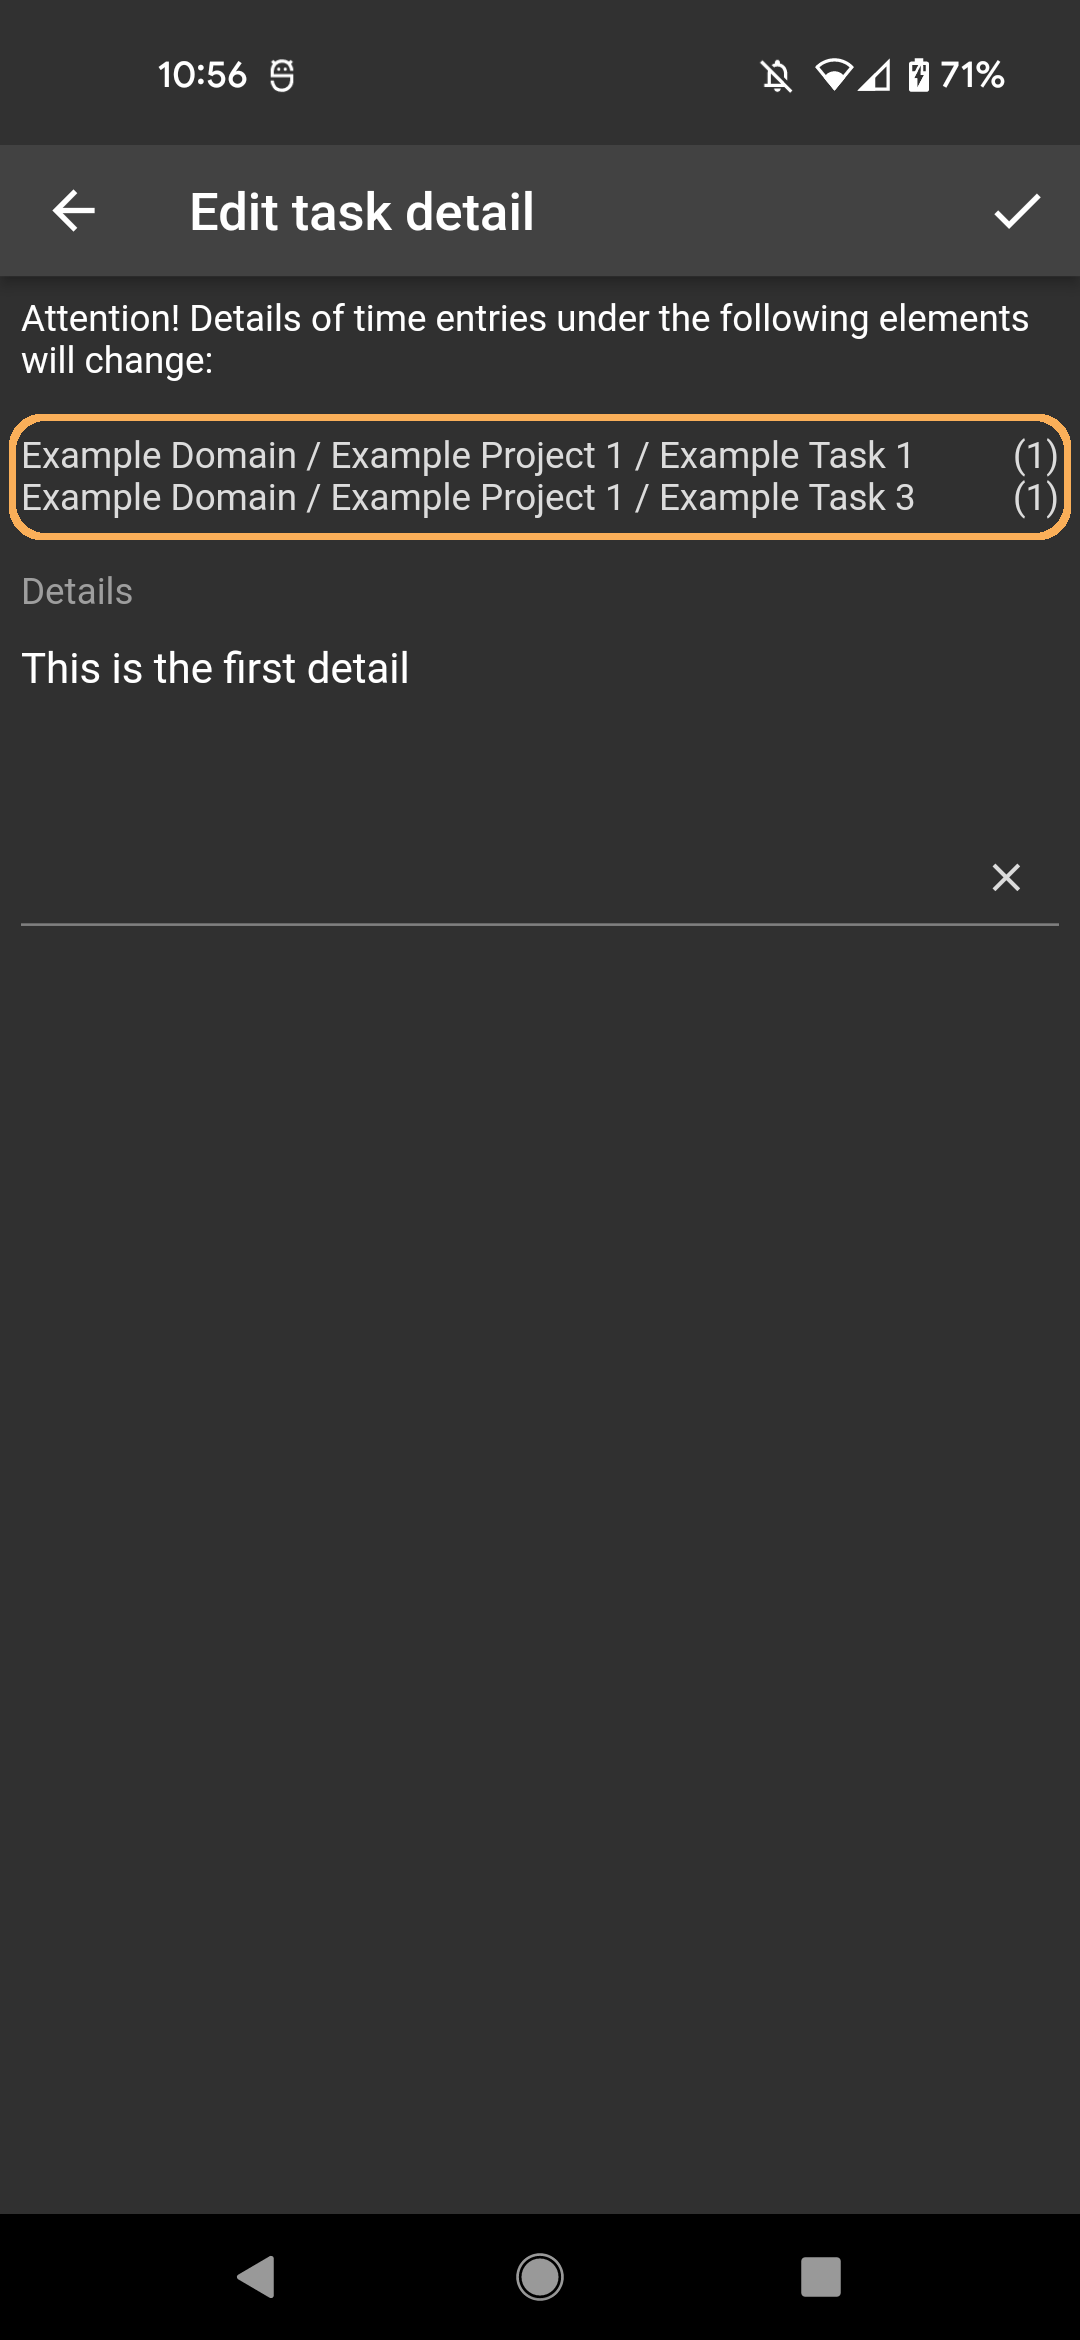
Create and change time entry details

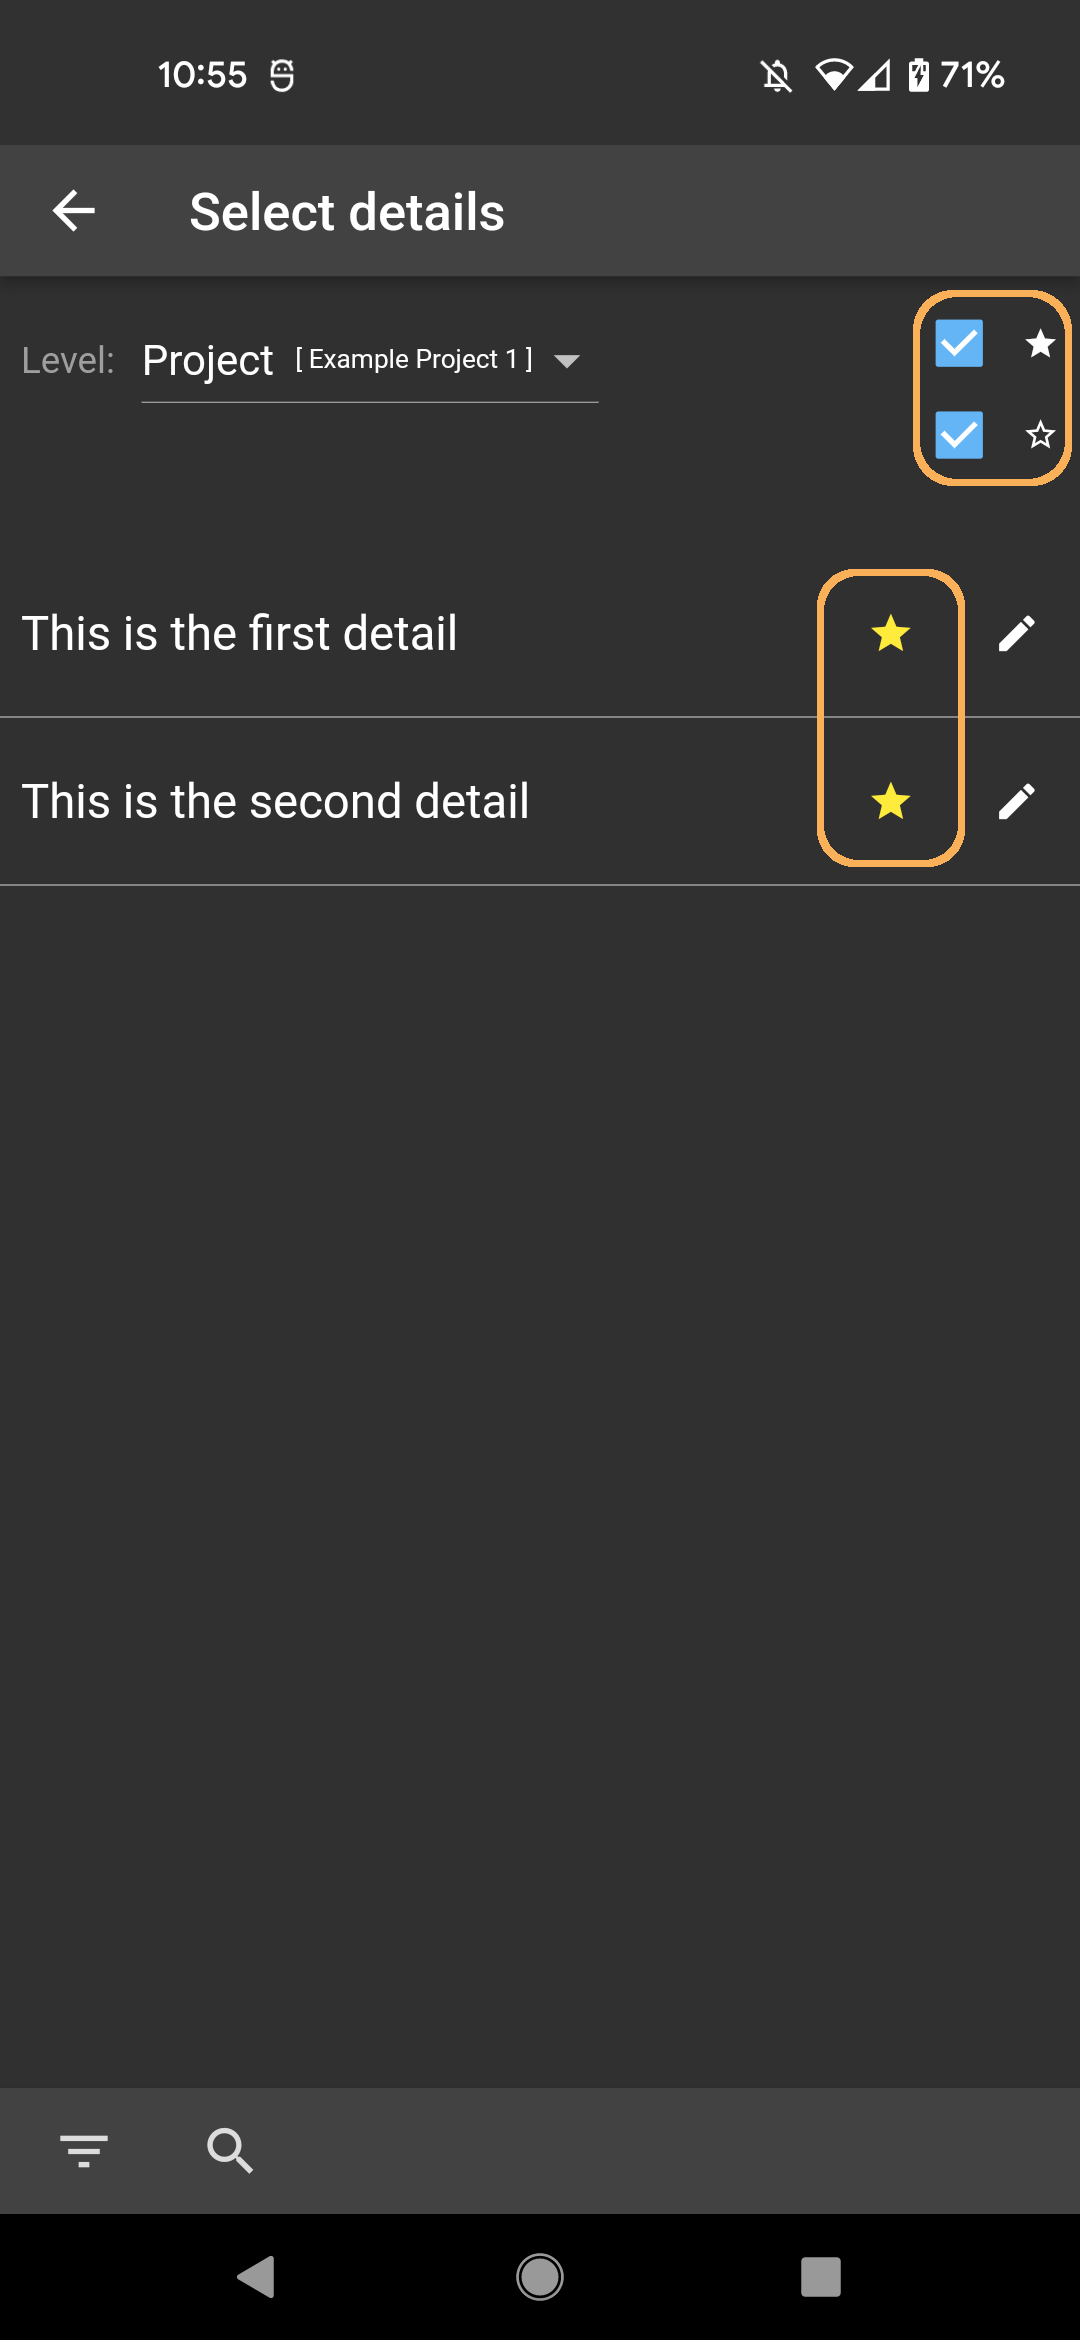
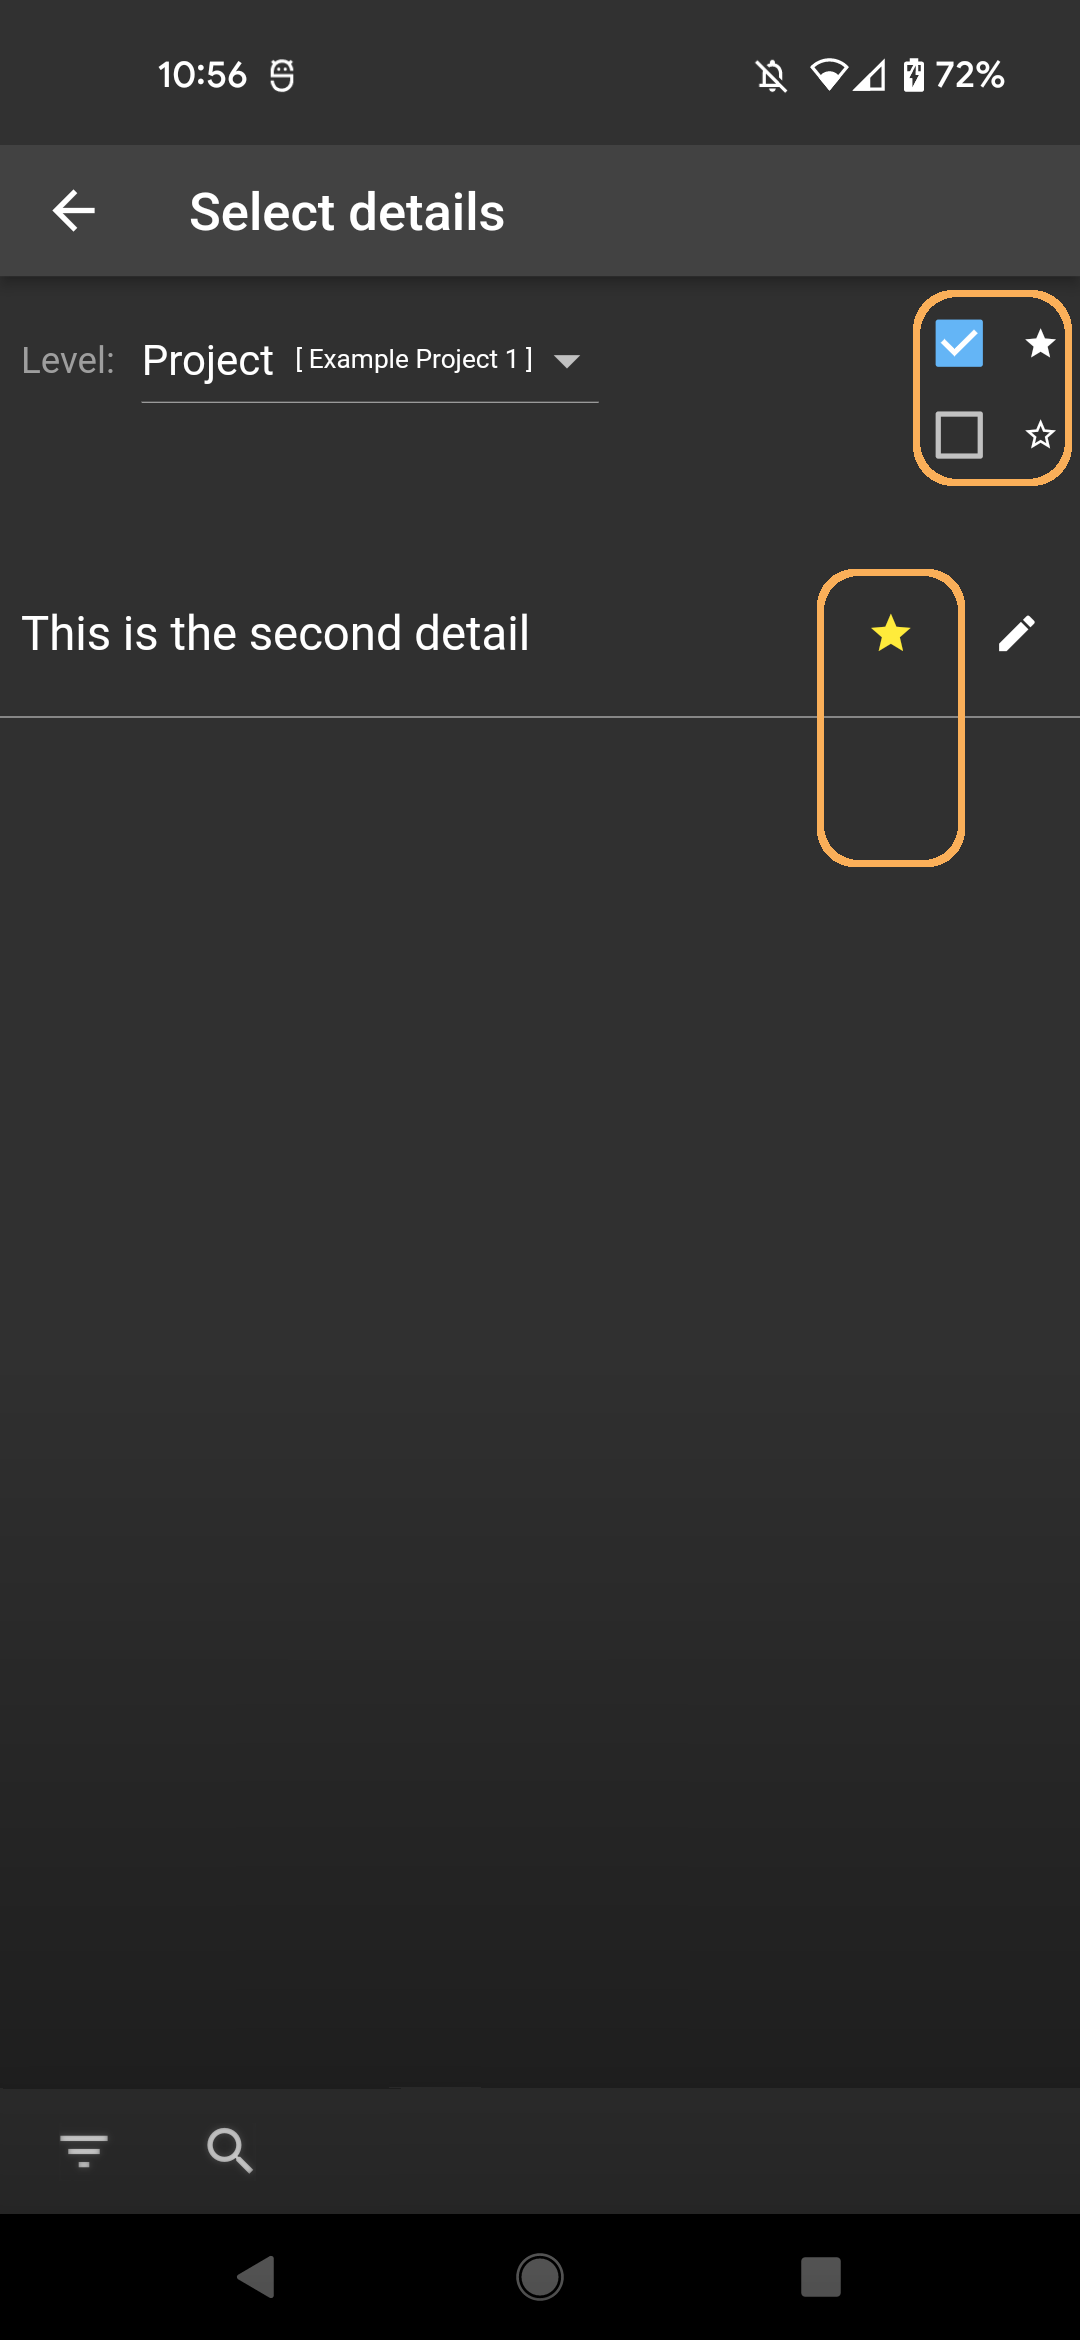
Filtering by favorite marking


Time zone support
The time zone is the deviation from the Coordinated Universal Time (UTC). Note: Because of the daylight saving time, the time zone can change during the course of a year about one hour (e.g.. New York: normal time = UTC+5 / daylight saving time = UTC-4)
For a time entry, beside the start and stop time, also the time zone is stored. With this information, it is possible to display a time entry always in the same manner, independat of the current valid time zone. For example when a time entry was recorded in New York while daylight saving time (UTC-4) from 08:00 AM to 12:00 AM and you are currently in Berlin (UTC+2), this time entry is still displayed with 08:00 AM to 12:00 AM. You can see immediately, what time of day a time entry represents.
Internal Backup
The Gleeo Time Tracker app writes backups, when the Internal backup function is explicitly turned on via the menu → Settings → Internal backup. Following data are written on to the so-called internal SD card.
- Time entries with domains, projects and tasks
- Project settings (colors, visibility states, activation state, parallel recording state)
- Task settings (visibility states, activation state, Sync&Team service: Location capture interval)
- All settings which are available via the settings menu
The path to the backup directory you select yourself when you enable the Internal backup.
To avoid data loss, beside enabling the Internal backup, it is highly recommended, to use at minimum one of the following actions periodically:
- Gleeo Time Tracker menu → Manage data → Export time entries
- Enable the Gleeo option Google Drive upload
- Copy the backup directory periodically to a PC
- Use the Sync&Team service (monthly fee)
Internal backup vs. Android function Backup & reset
Android 6.0 and newer offers the function Backup & reset. This function saves app data automatically on Google Drive. For Gleeo, this function is explicitly disabled, because not every Gleeo user like to upload his data to Google Drive. Further more, the Android Backup & restore function makes backups only when some requirements are given (Wifi connection, device is in sleep mode, device is charging). For some users, this requirements might be rarely fulfilled. But Gleeo offers the function Google Drive upload which uploads data from the Internal backup to Google Drive. When this functions are enabled, every time when Gleeo gets closed, a backup is written and given to Google Drive. Once Google Drive is ready to access the service (e.g. by a Wifi connection), the data gets uploaded to Google Drive.
The Android Backup & restore function saves one snapshot. However, the Gleeo Internal backup and Google Drive upload functions save the latest 100 changes.