Sync&Team
Time data, domains, projects and tasks can be synchronized with the chargeable Sync&Team Service across multiple devices and maintained via a web application. The team function allows projects to be shared so that multiple users can book on these projects. In addition, time records can capture the current location.
Guide for Sync&Team
Subscribe for Sync&Team via Android and iOS app
In the Android main menu select Sync&Team and follow the instructions.
Manage account
Please consider: for Stripe based subscription only - not for Google Play subscription
Manage your Stripe based subscription within the web application. You can every time expand or reduce the subscription, depending if you like to use the subscription for your self only or if you like to use it for several members.
Open the Subscription area via the man menu.
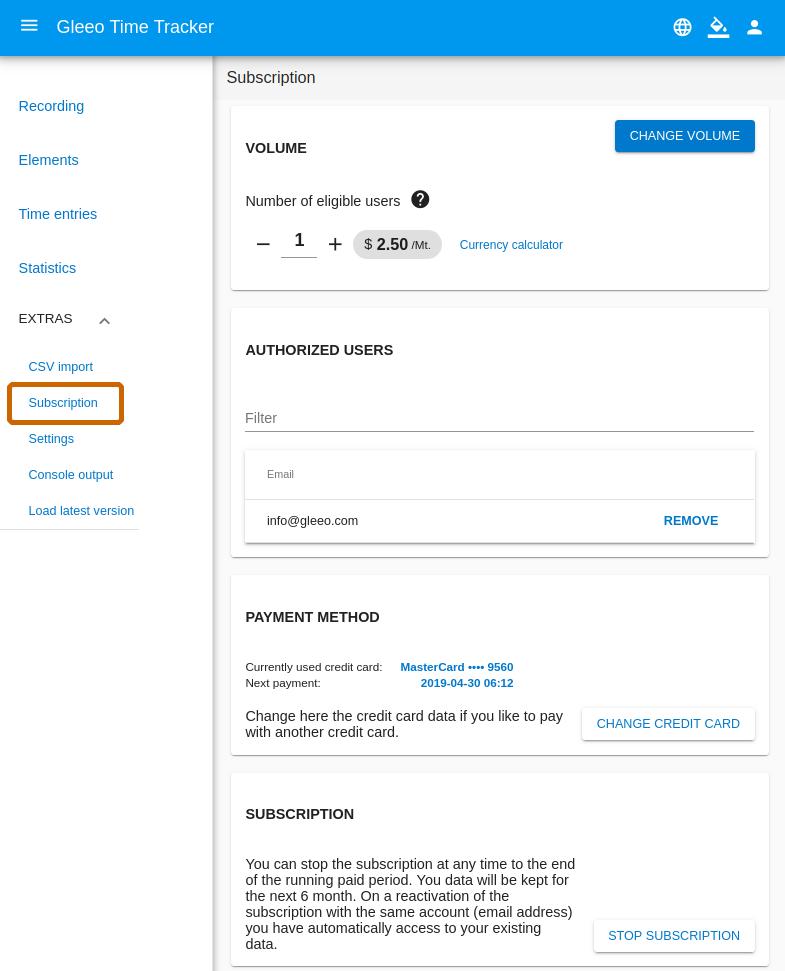
In this area, you can expand or reduce the subscription, change the used credit card or cancel the subscription. Depending on for how many user you subscribe, you can add here further email accounts. After you have added a further email account, this user has access to Sync&Team on the Gleeo Time Tracker app and he has also access to this web application.
First synchronisation from Android app
At first, the currently existing Gleeo Time Tracker app data are synchronized to Sync&Team. After that, the data are available via the web application and can be synchronized to another Android device where the same email account is used.
Step 1: Start the registration at Sync&Team. If this panel does not appear automatically, you can start the registration via the menu item Sync&Team.

Step 2: Select an existing Google account for authentication and log in with OAuth2. If you don't want to use a Google account for authentication, you can use your own email-based login. If you do not yet have an email-based login for Sync&Team, you can create a new one with Sign up.

Step 3: Set an encryption password for each domain. In the show case for the domain


Start the web application
Please note when using a Google Play subscription: In order to use the web application, the steps above must be carried out from the Android app. As a result, the email account used is registered and activated with the Sync&Team.
Step 1: Start the web application with this URL https://gleeo.com/gwa and select Log In.
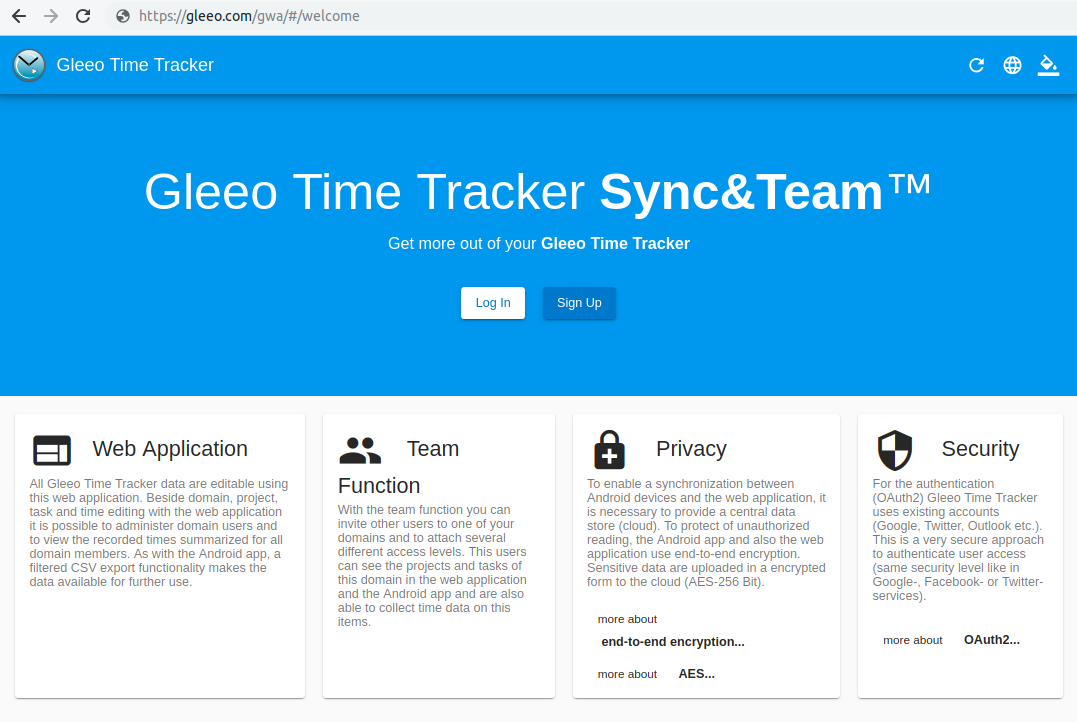
Step 2: Choose the same login as you used when registering in the Android app.
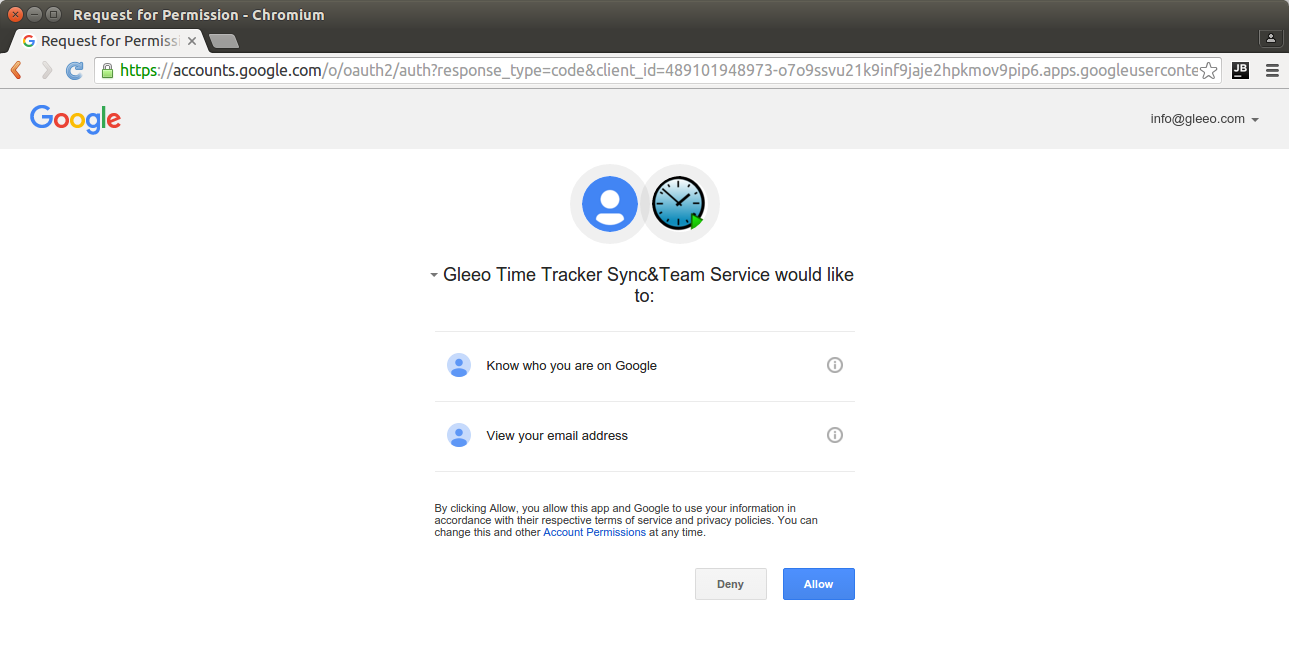
Step 3: When using a Google account, Sync&Team must be authorized to have the login checked by Google.
First use of the web application
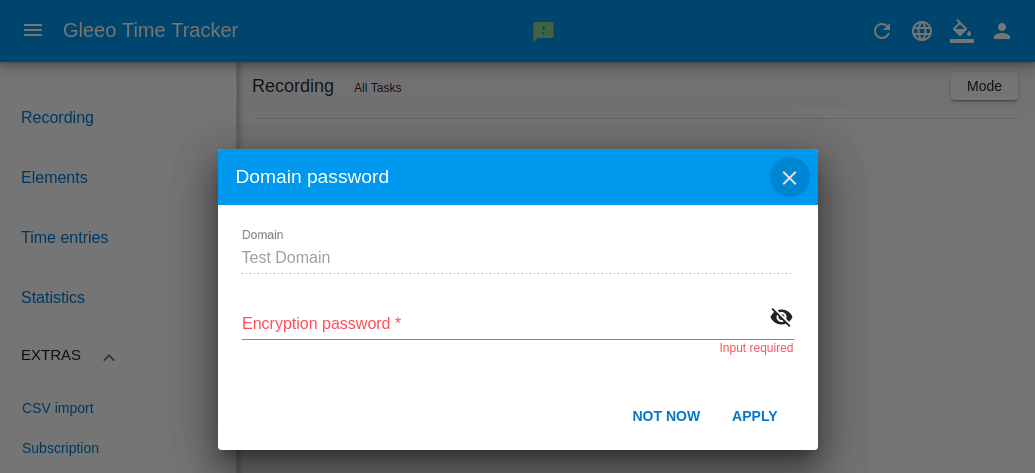
Step 1: If there are already data records existing, they come from an earlier installation or were uploaded in a encrypted form by the Android app. For each missing encryption password, an input dialog is displayed in which the encryption password must be entered. This enables the web application to decode the records.
Important: As in the Android app, the passwords are NOT transmitted to the service by the web application. It is therefore very important that you remember the passwords well. Without a password, there is no way to decrypt the data records.

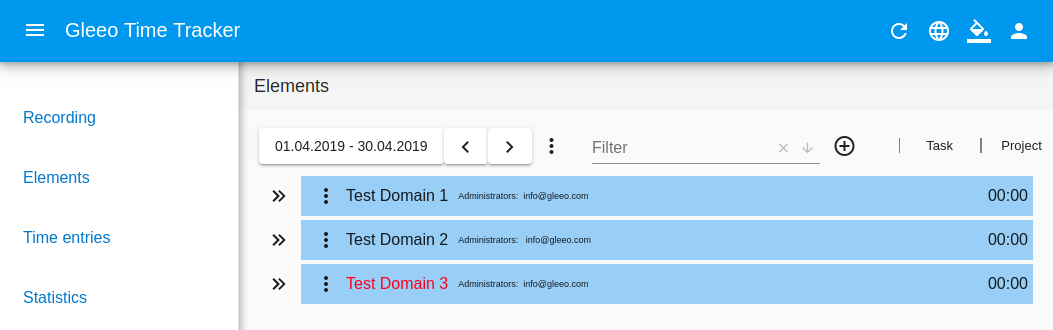
Step 2: In the elements overview, domain names are rendered red when the password is wrong or missed. With a click on the domain name the domain edit panel opens.
Display time data
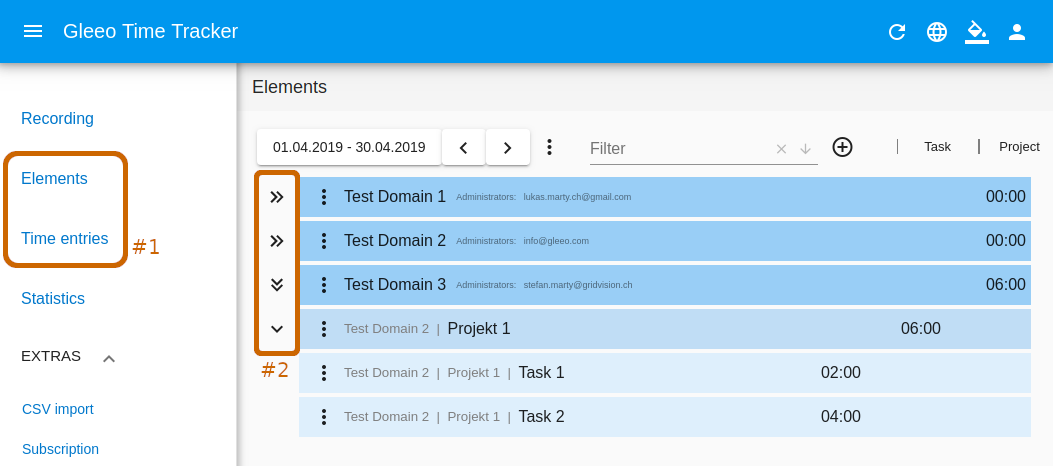
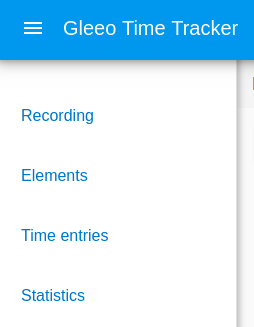
#1 | Switch between the elements overview and the time entries table. Click Elements to get the domain, project and task totals. Click Time entries to see the time entries for the selected period.
#2 | Click the button on the left, to show or hide the underlying projects and tasks.
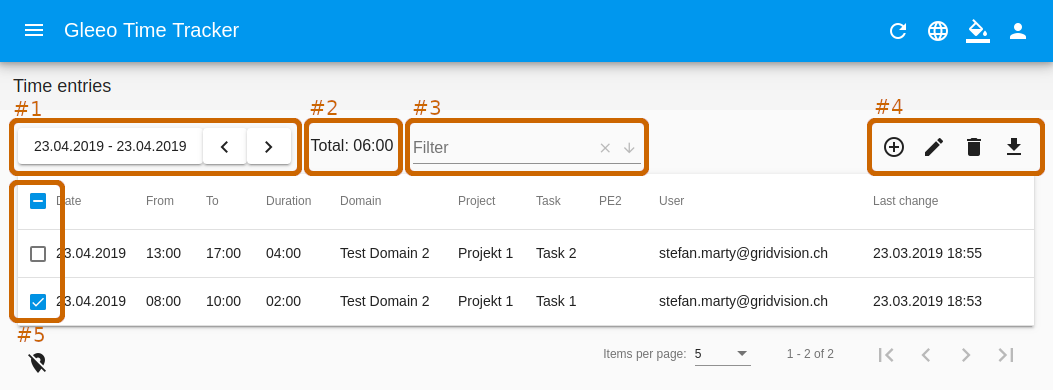
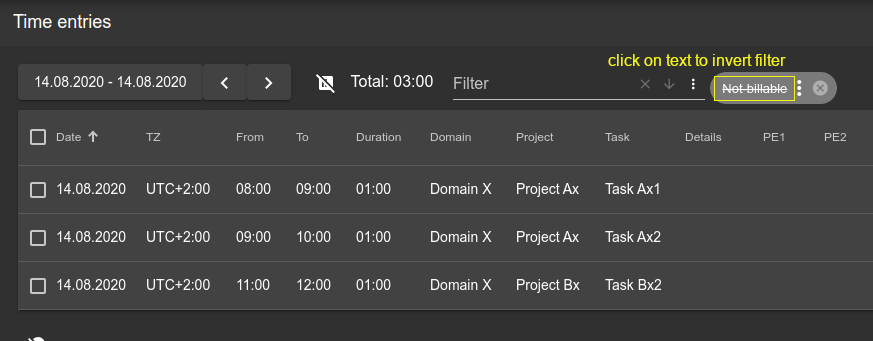
#1 | Select the desired date range.
#2 | The total for all time entries in the date range.
#3 | Full text filter to restrict the visible time entries. For example to a specific detail or to a user name.
#4 | Action buttons to manipulate table data.
#5 | Select to edit or delete a time entry.
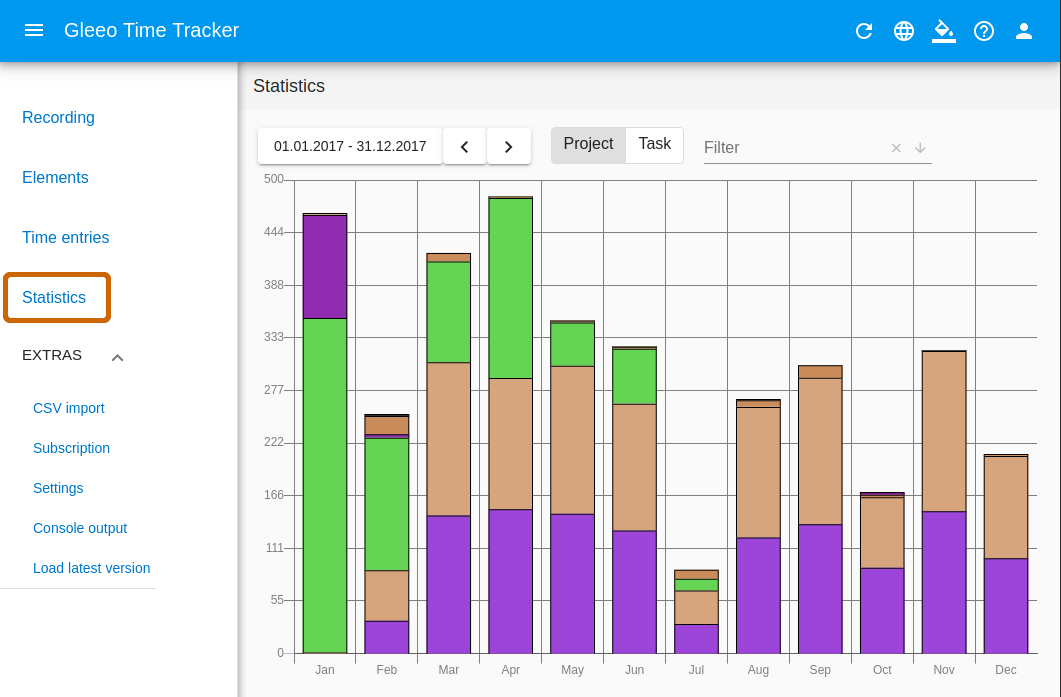
Select Statistics to displays a bar chart for a visual view of the existing time entries.
Share domains
Step 1: With a click on Elements and the domain context menu and the item Manage domain access the member management opens.
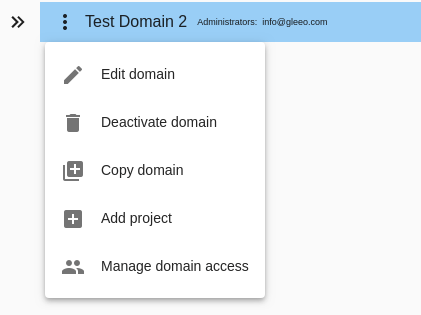
Edit domain | Change domain name or domain encryption password.
Deactivate domain | Releases this domain from the synchronisation.
Copy domain | Clones a domain with all his projects and tasks but without the related time entries.
Add project | Add a hidden or new project to this domain.
Manage domain access | Opens the member management page.
Step
2: All members of the selected domain are listed with the currently
assigned privilege. The assignment of a privilege is supplyed by a
selection of the options T0, T1, T2, T3, T4. The assignment is
immediately active (no confirmation).
A new user can be invited to a domain by entering his email address and pressing the button
Invite. You have to enter the email address which the new user should use for Sync&Team.
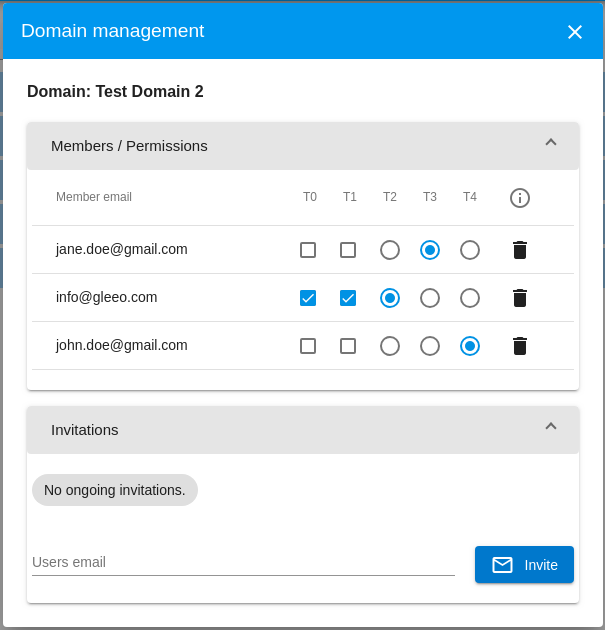
Schritt 3: The new user gets a email with a link to the web application where he can confirm or reject the invitation. Until the new user has not confirmed the invitation, he is listed under pending invitations.
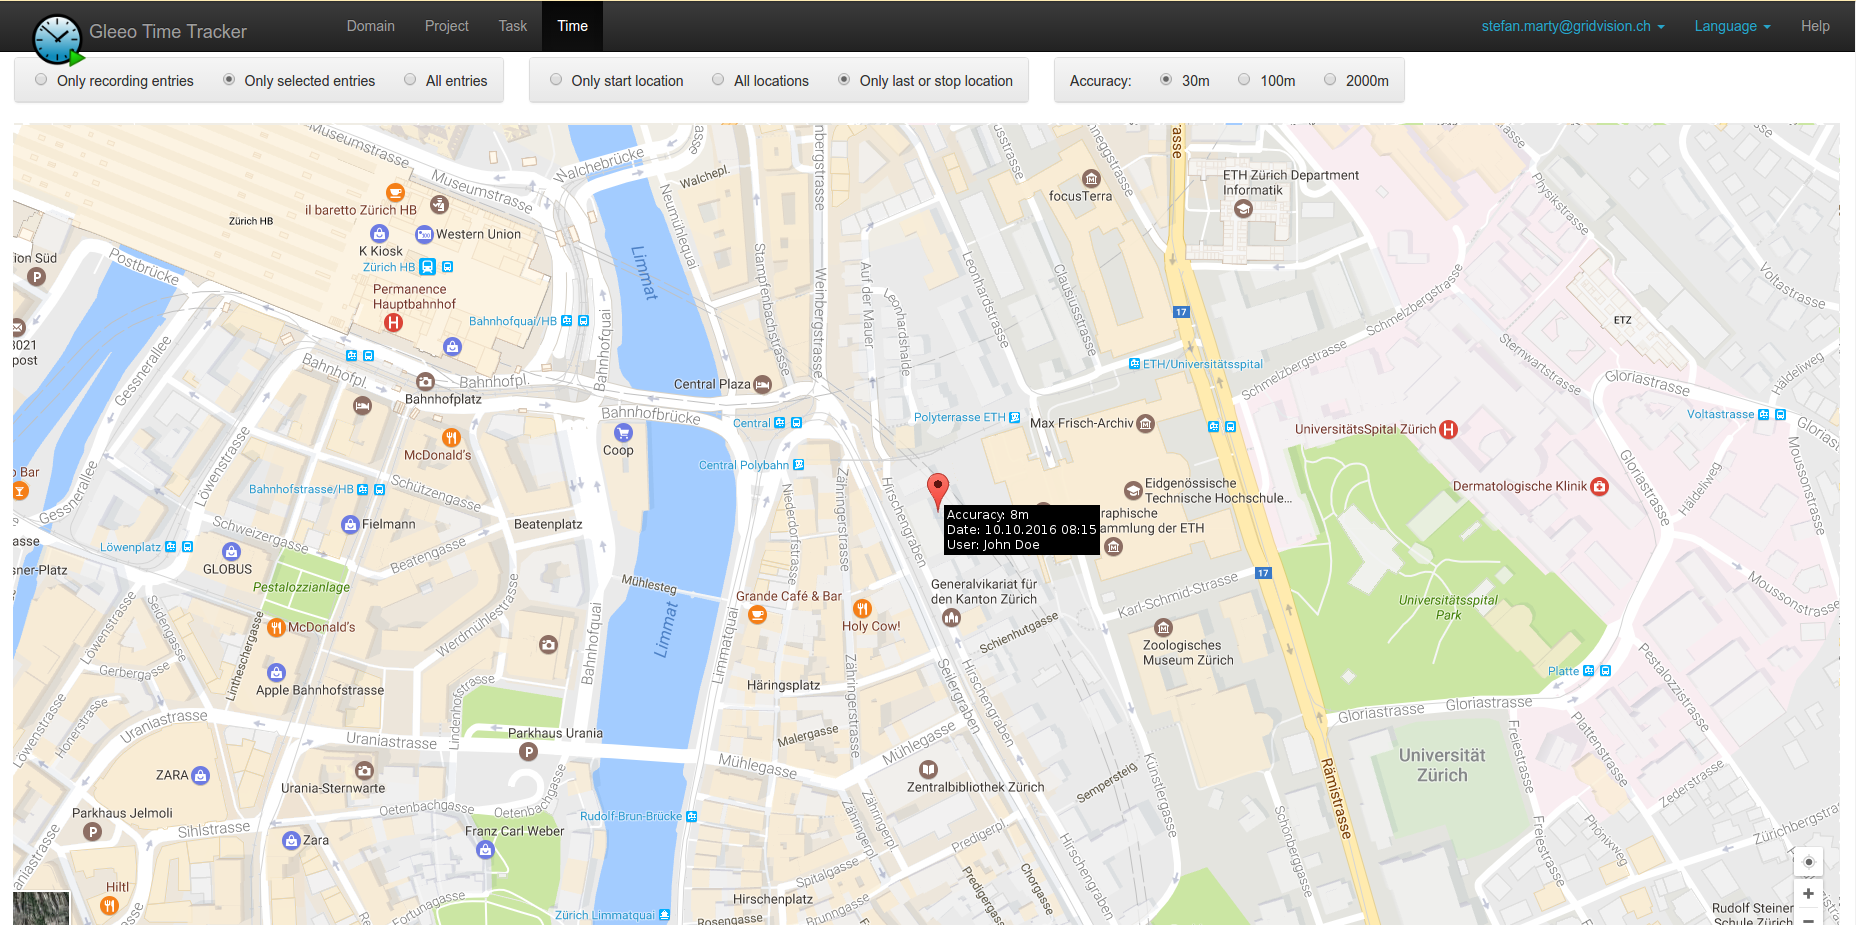
Show captured locations
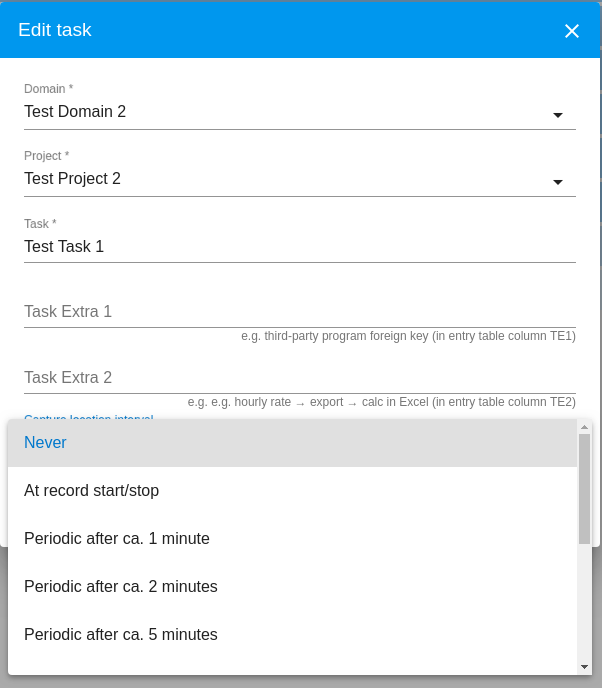
Step 1: In the app or in the web application setup the location capture periodicity per task.
Step 2: In the web application below the time entry table you can display the captured locations.
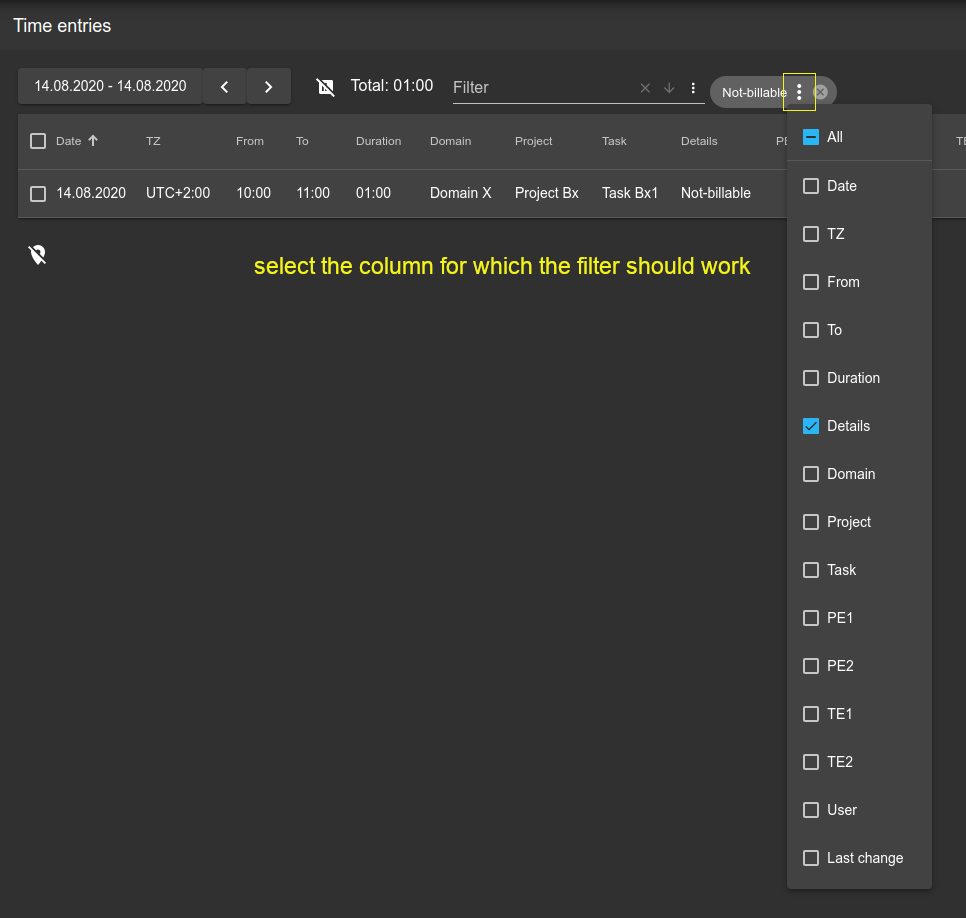
How to use data filters
Tip: Invert filter to show data which does not contain a certain text.